
informatica powercenter 9.x Installation and Configuration graphics detailed tutorial (for Windows)
informatica powercenter 9.x is a very easy to use and powerful data integration platform, mainly to facilitate users to manage all kinds of database operations, can be said to be a very widely used ETL tool (Note: ETL is used to describe the process of extracting, transforming, and loading data from the source end, which is often referred to as the data warehouse in the industry, and of course the object is not limited to the data warehouse. Mainly used for database, read, conversion and other operations, this article is mainly for you to describe in detail the informatica powercenter 9.x installation and configuration steps under Windows, interested friends to understand it.
informatica powercenter v9.5.1&9.6.1 Free in English (with installation tutorial)
- Type: Programming tool
- Size: 13.2GB
- Language: English software
- Time: 2017-09-27
ETL implementation method
● Install the Oracle server
● Create a new user under the database to manage the database, which is used to store source tables and target tables.
● Install the Oracle client
● Install the ETL server
● Install the ETL client
informatica powercenter Installation preparations: Database support is required
Install the Oracle 11g Server
● Create database
● Create database users: Before installing Informatica PowerCenter, you need to create a user under the database to manage the database. (Note the character set Settings)
● Used to create source tables and target tables, and store data. (Data warehouses and databases are usually separated by two instances.)
Note: 11G is not compatible with Windows Server 2012
Step 1 Install only the database software
All the way to the next installation is complete

Step 2 Create a database
Start the Database Configuration Assistant
Select Create database

Select custom database

The global database name is the instance name

Remove the check box for configuring Enterprise Manager

Storage type and file location

The database component selects only the Enterprise Manager archive

Click all initialization parameters button, click Advanced parameters, modify nls_date_format

After installation, our database directory is as follows
CTL indicates the control file, REDO indicates the log file, and DBF indicates the database file

Install the Oracle 11g Client
Note Install the 32-bit version
● Configure net manager and define the service name
● Create a database user to ensure the installation of the ETL server below
● Easy use of enterprise Manager to manage Oracle servers
Select administrator

All the way to the next installation is complete
Oracle Database Configuration
Step1 First create a listener for the server
Without configuration, our database server would not be connected
Open Net Manager in the server directory,
1. Click Listener and then click the plus sign to create

2. Click Add Address
Usually the IP address is written on the host

3. Click Save Network configuration

Step 2 Start the listening service
Command line Enter a command to start the listener
lsnrctl start

Step 3 Configure the client
Click Net Manager in the client directory
Click on the name of the service, click on the plus sign, the name of the network service is arbitrary

Click Next, select Tcp/Ip then click Next, and enter the host name or IP address

Then type the service name with the instance name that was taken when the database was created

Click Next, click Test

The above login denied prompt has actually been successful.
After the entire configuration is complete, click Save Network configuration again

Create database user
Install PLSQL Developer and connect to the server for configuration. PLSQL uses the Oracle Client and supports only 32Bit
1. Run PLSQL and log in as the sys user. Select SYSDBA for Connect as

2. Create users for Informatica to use
Open the command line window, enter the following command, and run it

CREATE USER INFA IDENTIFIED BY INFA DEFAULT TABLESPACE SYSTEM TEMPORARY TABLESPACE TEMP PROFILE DEFAULT ACCOUNT UNLOCK;
GRANT CONNECT TO INFA;
GRANT RESOURCE TO INFA;
GRANT CREATE VIEW TO INFA;
GRANT UNLIMITED TABLESPACE TO INFA;
GRANT SELECT ANY TABLE TO INFA;
ALTER USER INFA DEFAULT ROLE ALL;
COMMIT;
-- The following statement depends on the permissions you have
select * from dba_role_privs;
select * from dba_sys_privs;
3. Check whether the user is created successfully
Click on the menu Session - > Login

The entire database environment is set up with Informatica installed.
informatica powercenter installation tutorial
Server installation
Notice By default, the listener service does not start automatically after 11g is installed. You can set the listener to start automatically when you enter Services. Otherwise Informatica cannot access the database
When installing INFORMATICA, check 'Run the preinstallation check tool' when prompted to modify the open_cursors.
Modify the code as follows:
show parameter open_cursors; -- Displays parameter values
alter system set open_cursors = 1000; -- -- Change the value of the parameter to 1000
commit; ---- submit
Install all the way to the next step, because this is the first installation choose to create a domain

Configuration information. Write in the previous Oracle environment information


Deselect other accounts

Installation complete

Client installation
Select only PowerCenter Client

INFORMATICA Data source Configuration
● ODBC configuration operation
● Database tnsnames file configuration
● WORK FLOW configuration
ODBC
1. Start the Net Configuration Assistant in the server software directory
Select the local network service name configuration

Type the instance name


Enter the host name or IP address

2. Select the Oracle11G driver. The client reports an error when selecting the driver. Unknown cause

Here's a test to see if it works. The User ID is not very important here, because you will use a different ID when importing later

tnsnames file
The tnsnames.ora file in this installation path actually corresponds to the 'service name' we created earlier with Net Manager.
C: \ \ Administrator \ product \ app 11.2.0 \ client_2 \ NETWORK \ ADMIN \ tnsnames ora
Workflow configuration
Open the Informatica Administrator Home Page in the server directory, right-click Domain -> New ->PowerCenter Repository Service


In addition, the operation mode in the property is changed to 'normal'.

After the configuration is complete, open Informatica PowerCenter Workflow Manager (several other components can also be used, and all have the same configuration).
Click 'Repository' -> 'Configure Domain', click 'Add New domain' button, enter the configuration information when installing the server.

Click the Connect button, noting that the username is case sensitive.

Click Relational

Create a database connection.

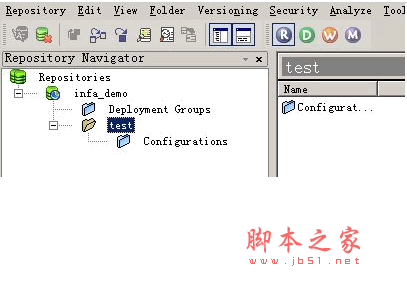
Step1 Open the Repository Manager and create a new folder

Step2 Open PowerCenter Designer
Connect to the repository, and the folder you just created will be displayed

The installation process is now complete.
The above is the informatica powercenter 9.x installation and configuration tutorial organized by the script home. I hope it can help you. If you have questions, you can leave us a message in the comment box below. We will do our best to answer your questions. Thank you for your continued support, and please stay tuned for future tutorials and software from Script House.
Related article
-

How does git set untracked changes in vscode?
How does git set untracked changes in vscode? Want to improve untracked file management, where to set? Let's take a look at the detailed tutorial2023-06-07 -

hbuilder built-in browser download failure check the solution to network problems
Encounter hbuilder built-in browser download failure, check the network problem, resulting in the built-in server may not be able to start normally for many reasons, please see below for details2023-05-31 -
 What is the difference between hbuilder and hbuilderx? HBuilder is a pure HTML5 development tool, HBuilderX is an upgraded version of HBuilder, let's take a look at the difference between hbuilder green and red introduction2023-05-31
 -

What's the difference between hbuilderx and Android? Two software features introduced
What's the difference between hbuilderx and Android? When choosing software, many friends do not know which software to choose, today we will take a look at hbuilder and Androidstudio two software features2023-05-31 -

How does VSCode use push force on leases? In VSCode, git is enabled to force push with lease
How does VSCode use push force on leases? This function is not very commonly used, many friends do not know where to open, let's take a look at VSCode git open with lease forced push skills2023-05-25 -

How does Python software view keywords? Python method of viewing keywords
Python is an object-oriented interpretive computer programming language. This article introduces the method of using python software to find keywords2023-05-18 -

Visual Studio 2022 17.6 update released (with official download)
Microsoft today officially launched the Visual Studio 2022 17.6 update, introducing a set of powerful tools and features to help developers create great applications and experiences, as detailed below2023-05-18 -

The Microsoft Visual C++ Build Tools installation package is missing or damaged
When you install Microsoft Visual C++ build tools in Windows10, you will be prompted that the installation package is lost or damaged. In this case, you need to install the Visual C++ build tools offline package, which is an offline installation package2023-05-17 -

SAPIEN PrimalXML Registry use tutorial with activation patch download
SAPIEN PrimalXML register how to use! SAPIEN PrimalXML 2023 is a simple and useful XML editing tool that can be used to edit, manipulate, and create XML files, and to quickly view some XML data, or for others2023-05-17 -
VS2022 installation tutorial and instructions
Below I will VS2022 development tools installation tutorial to share with you, and you want to download this, you can enter "VS2022" in the public number, I provide is the community version. If you need other versions, go to Microsoft official download2023-05-03
Latest comments