
IIS6+PHP5+MySQL5+Zend Optimizer+phpMyAdmin安装配置图文教程 2009年
更新时间:2009年06月08日 01:25:07 作者:
IIS6+PHP5+MySQL5+Zend Optimizer+phpMyAdmin安装配置教程 2009年最新版
便于大家转载和离线阅读,本教程的HTML源码、UBB源码、PDF版本、Flash版本提供下载。
下载地址: http://code.google.com/p/wpmi/downloads/list
操作系统:Windows.Server.2003.R2,Enterprise.Edition,SP2,x86,CHS,VOL,MSDN
本次配置PHP的服务器环境:Windows2003+ IIS6+PHP5+MySQL3+Zend+phpMyAdmin
整个配置过程需要是使用拥有管理员权限的系统帐号登录Windows
在整个配置过程中所示的截图可能根据各使用的系统不同,窗口界面而有所不同,但对应的选项卡栏目是相同的,只需要找到提到的对应选项卡即可。
一、下载相关软件
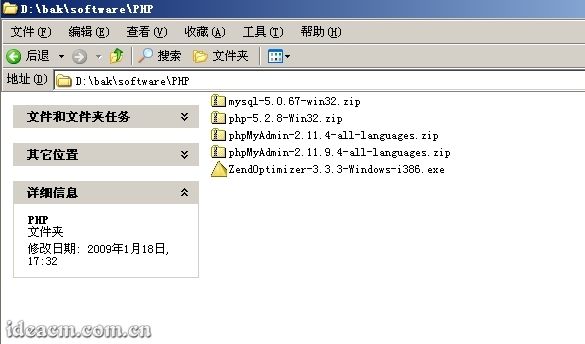
安装前需要准备的软件(因为我这里用的服务器操作系统是x86版本的,所以以下程序 均为在Windows x86环境下使用的版本)无特殊说明均为 截止到2009年1月16日的最新版:
1、 PHP 推荐PHP 5.2.8的ZIP压缩包版本
PHP 5.2.8 zip package [10,115Kb] - 08 December 2008
MD5:71511834881753ea0906f2bca91632b9
官方下载页面: http://www.php.net/downloads.php
http://cn2.php.net/get/php-5.2.8-Win32.zip/from/a/mirror
直接下载地址: http://cn2.php.net/distributions/php-5.2.8-Win32.zip
2、 MySQL 推荐MySQL 5.0.67 的Windows ZIP/Setup.EXE (x86)版本
MD5:ed76e5ad8b251ca643766c70926854d7
官方下载页面: http://dev.mysql.com/downloads/mysql/5.0.html#win32
http://dev.mysql.com/get/Downloads/MySQL-5.0/mysql-5.0.67-win32.zip/from/pick
直接下载地址: http://mysql.cs.pu.edu.tw/Downloads/MySQL-5.0/mysql-5.0.67-win32.zip
3、 Zend Optimizer 推荐 最新版,现在的最新版是Zend Optimizer v3.3
(虽然下载是免费的,但是要注册用户,才可以下载,为了方便大家的使用,公开我注册好的用户名:ideacmblog密码:ideacm.com.cn,方便大家使用,希望大家在使用这个帐号的时候不要修改密码和用于其它非正当途径)
MD5:f1766065288d509d5286c4c3c7239412
官方下载页面: http://www.zend.com/en/products/guard/downloads
直接下载地址: http://downloads.zend.com/optimizer/3.3.3/ZendOptimizer-3.3.3-Windows-i386.exe
4、phpMyAdmin 在这里不推荐使用最新版,推荐 phpMyAdmin 2.11.9.4 的 phpMyAdmin-2.11.9.4-all-languages.zip版本
MD5:84a4399fdac85f4fbeb0ff68a5a89edd
官方下载页面: http://www.phpmyadmin.net/home_page/downloads.php
直接下载地址: http://nchc.dl.sourceforge.net/sourceforge/phpmyadmin/phpMyAdmin-2.11.9.4-all-languages.zip
二、安装配置前的准备工作
2.1、 先把下载回来的文件使用杀毒软件进行一次病毒扫描,以防意外。 【图一所示】
【图一】
2.2、 好了,现在开始环境配置:
假设操作系统安装在C盘,如果你的系统不是安装在C盘,请将下面提到的盘符自己对应修改。同时,为了避免C盘因为重装系统等各种原因对C盘进行操作, 不建议将PHP相关软件安装在C盘中,这里我把PHP相关程序安装在D:\PHP目录下(这个目录你也可以自己定义,如果你要安装在与此不同路径,请自行修改一下所提到的对应路径)。
三、正式开始环境配置
第一步、安装PHP
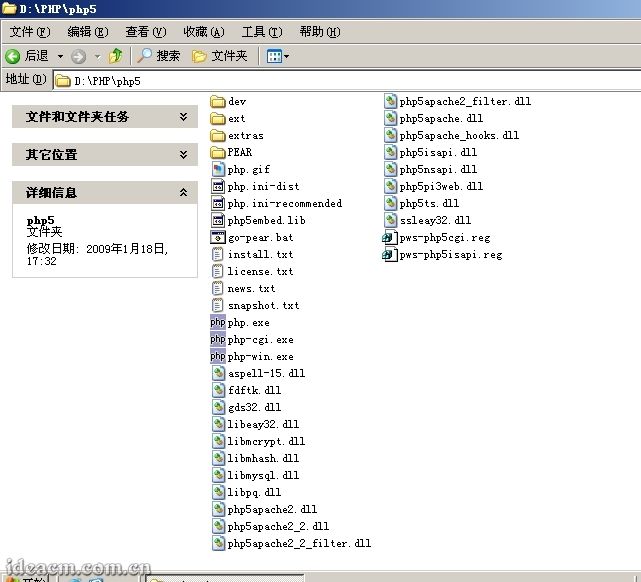
3.1.1、 将下载得到的 php-5.2.8-Win32.zip文件解压至 D:\PHP目录中,将得到的二级目录 php-5.2.8-Win32改名为 php5;也可以将 php-5.2.8-Win32.zip解压在默认位置,然后将解压后的文件和文件夹复制到 D:\PHP\php5 【图二所示】。
【图二】
3.1.2、再将 D:\PHP\php5目录下的所有 dll文件复制到 C:\windows\system32下(Windows2000系统为C:\winnt\system32,下同),如果已经有若干同名文件存在,覆盖即可。 【图三、四所示】
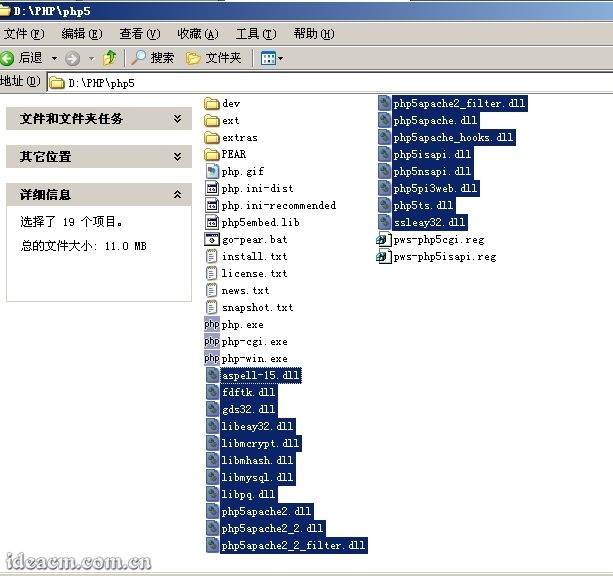
【图三】
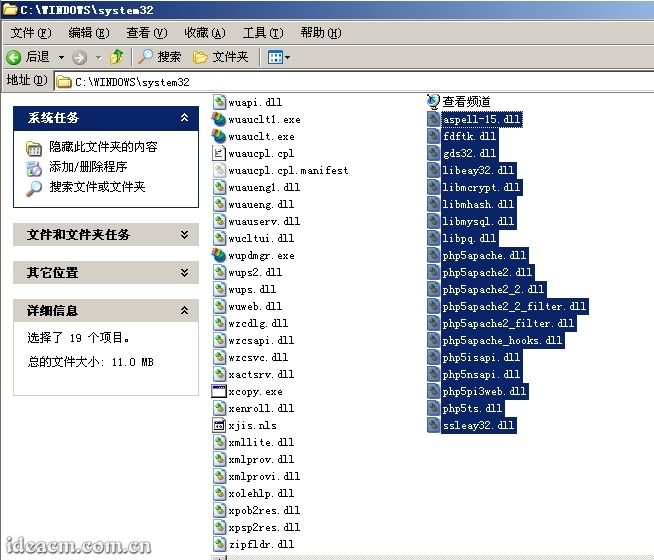
【图四】
3.1.3、将 D:\PHP\php5目录下的 php.ini-dist复制一份,更名为 php.ini(还是在当前目录中) 【图五所示】,再用文本编辑软件打开这个 php.ini(建议使用Notepad2、EditPlus、UltraEdit等各种支持语法高亮显示的文本编辑软件)。
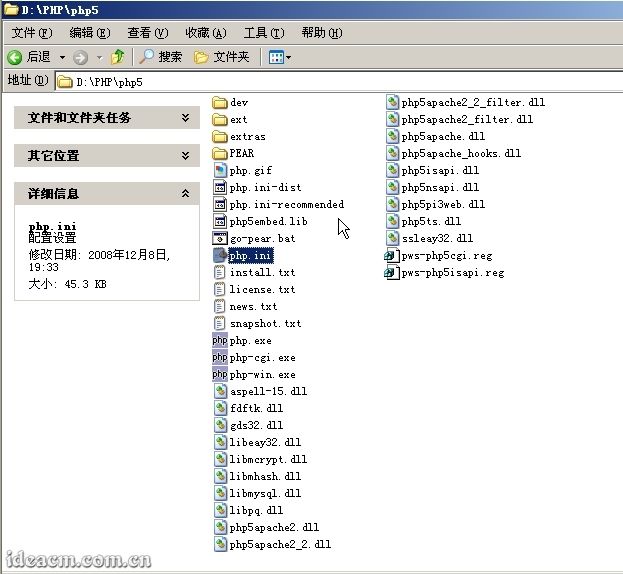
【图五】
3.1.4、 查找: register_globals = Off (约第419行)
将 Off更改为 On,即得到 register_globals = On ;
注:这个对于PHP的全局变量功能,考虑有很多PHP程序需要全局变量功能所以打开,打开后请注意PHP程序的严谨性,如果不需要全局变量功能,请保持默认Off状态。
再搜索 extension_dir = "./" (约第491行)
将其路径知道你的PHP目录下的扩展功能目录中,这里PHP5对应修改为 extension_dir = "D:/PHP/php5/ext" 。
再在 D:\PHP下建立文件夹,并命名为 tmp
查找 ;upload_tmp_dir =
将 ;upload_tmp_dir =该行的注释符,即前面的分号” ;”去掉,使该行在 php.ini文档中起作用。
upload_tmp_dir是用来定义上传文件存放的临时路径,在这里你还可以修改并给其定义一个决定路径,需要注意的是,这里设置的目录必须有读、写权限。
这里我设置为 upload_tmp_dir = D:/PHP/tmp (这里就是我前面建立的文件夹)
3.1.5、 搜索 ; Windows Extensions,定位到 php.ini文件的约 604行,将下面列出的常用扩展前面的分号注释符去掉:
特别提示: Exif扩展是用来显示图片的exif信息的,因该扩展需要mbstring支持,所以将extension=php_exif.dll这一行移动到extension=php_mbstring.dll一行的下面。
3.1.6、 查找: ;date.timezone =
去掉前面的分号注释符,这里将其设置为 date.timezone = PRC
3.1.7、 查找 :;session.save_path = "/tmp"
将前面的分号注释符去掉,这里将其设置为 session.save_path = "D:/PHP/tmp" (这里就是我前面建立的文件夹)
3.1.8、 如果你有遇到无法上传较大文件或者运行某些程序经常超时,那么可以修改以下内容来调整相关限额:
在大约第 255行,
max_execution_time = 30 ; 这个是每个脚本运行的最长时间,根据你的需求更改数值,单位秒
max_input_time = 60 ; 这是每个脚本可以消耗的时间,根据你的需求更改数值,单位也是秒
大约第 258行,
memory_limit = 128M ; 这个是脚本运行最大消耗的内存,根据你的需求更改数值。
大约第 552行,
upload_max_filesize = 2M
上载文件的最大许可大小 ,根据你的需求更改数值,M是单位:兆。
3.1.9、 php.ini文件中基本就是作如上修改,其他的你可以根据自己的具体需求修改,然后将该文件保存,再复制一份到 C:\Windows下面。
第二步、安装IIS
3.2.1、打开“ 添加或删除程序”面板 【图六所示】
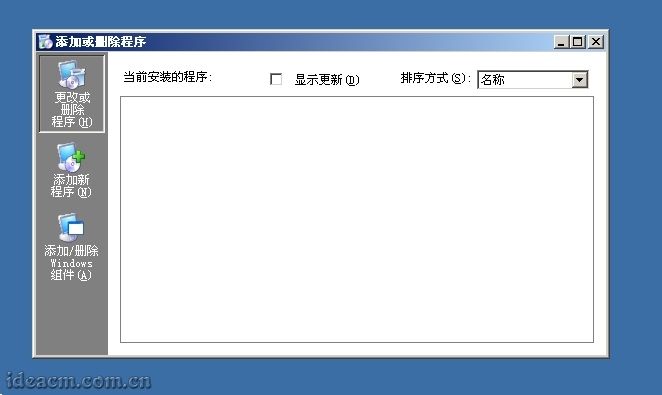
【图六】
3.2.2、点击“ 添加/删除Windows组件(A)” 【图七所示】
【图七】
3.2.3、可见“Windows组件向导” 【图八所示】
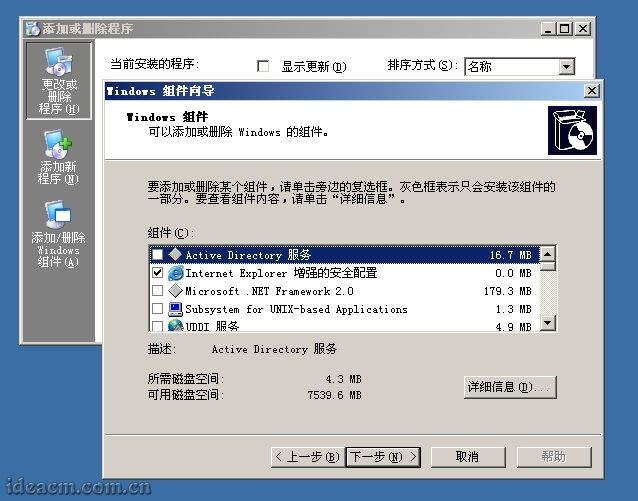
【图八】
3.2.4、拖动面板里面的右边滚动条,直到看到“ 应用程序服务器”,在其前面复选框点击选中,然后点击“ 详细信息”,再点击“ ASP.NET”前面的复选框,再在“ Internet信息服务(IIS)”上点击一下(当前这里的复选框是已经选择的,这里在其文字上点击,不是点击签名的复选框),再点击“ 详细信息(D)”在打开的面板中,把右边滚动条往下拖。再在“ 万维网服务”上点击一下,再点击“ 详细信息”。
勾选中“ Active Server Pages”、“ Internet 数据连接器”、“ 在服务器端的包含文件”;“ 万维网服务”已经是被选中状态。
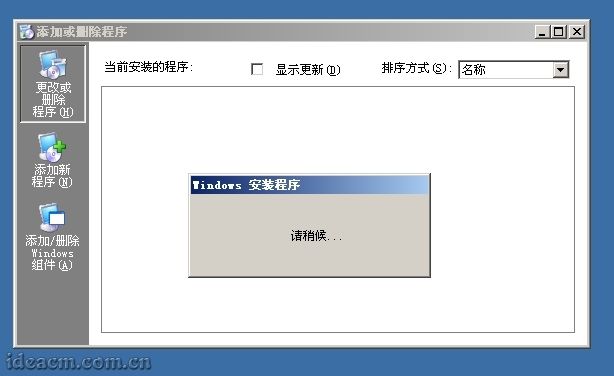
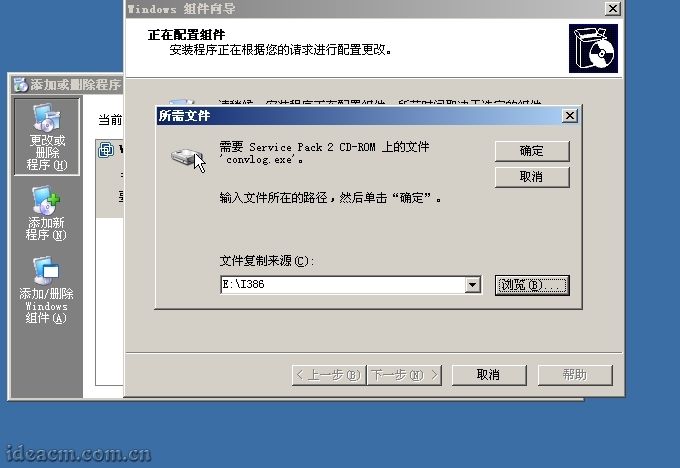
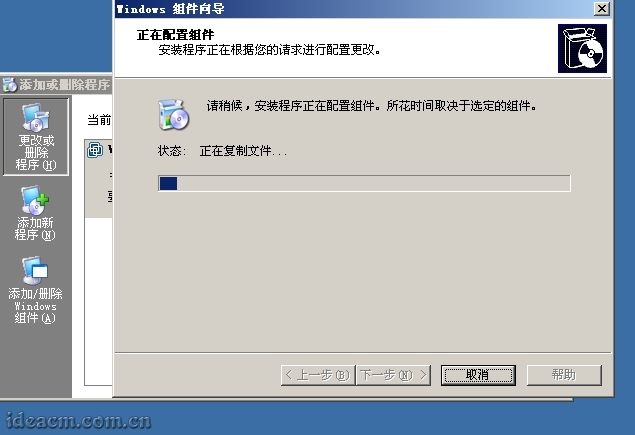
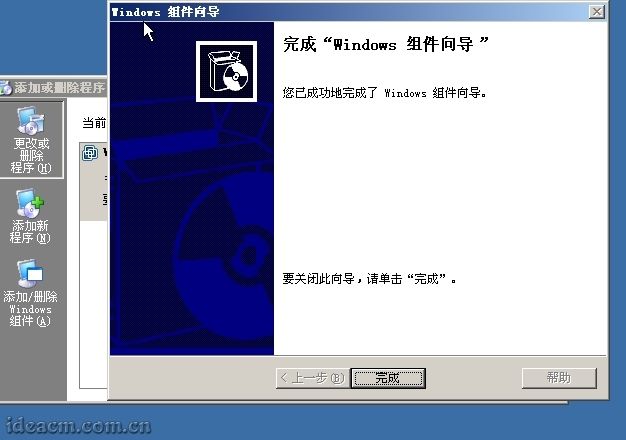
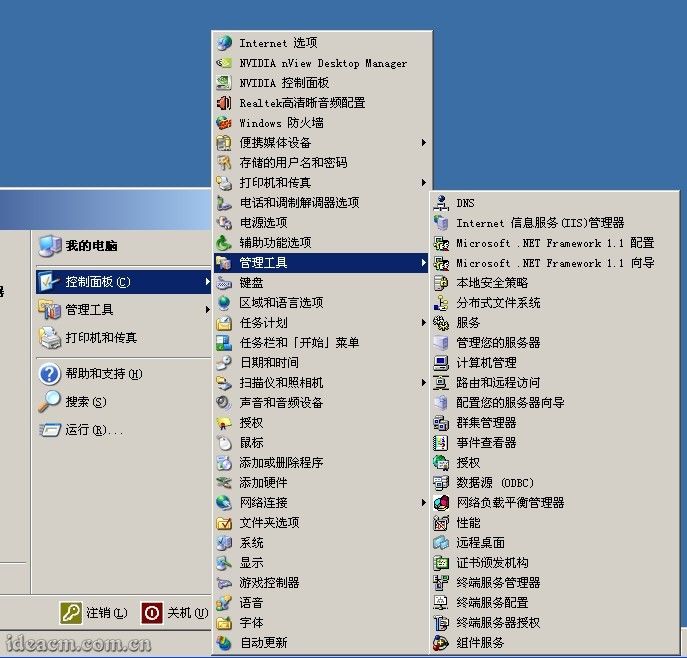
3.2.5、然后点击确定(万维网服务面板)-确定(Internet 信息服务(IIS)面板)-确定(应用程序服务器面板) 【图九所示】-下一步(Windows 组件向导面板),配置过程中会弹出所需文件对话框 【图十所示】,这个时候把本系统的安装光盘插入光驱,点击浏览,选择光驱盘符,进入 i386文件夹,此时会自动显示所需要的文件,直接点击“ 打开” 【图十一所示】,再点击“ 确定” 【图十二、十三所示】,这个时候又会弹出一个“ 所需文件”的对话框,还是按照刚才的步骤,点击“ 浏览”,然后定位到i386文件夹,此时会自动显示所需要的文件,直接点击“ 打开”-“ 确定”,然后等待,直到“ Windows 组件向导”完成界面 【图十四所示】,点击“ 完成”,出现“ Windows 安装程序 请稍候…”的对话框,等待其自动关闭,然后关闭“ 添加或删除程序”面板,在 开始- 控制面板- 管理工具菜单里面即可看见“ Internet 信息服务(IIS)管理器”,这个时候IIS就已经安装好了 【图十五所示】。
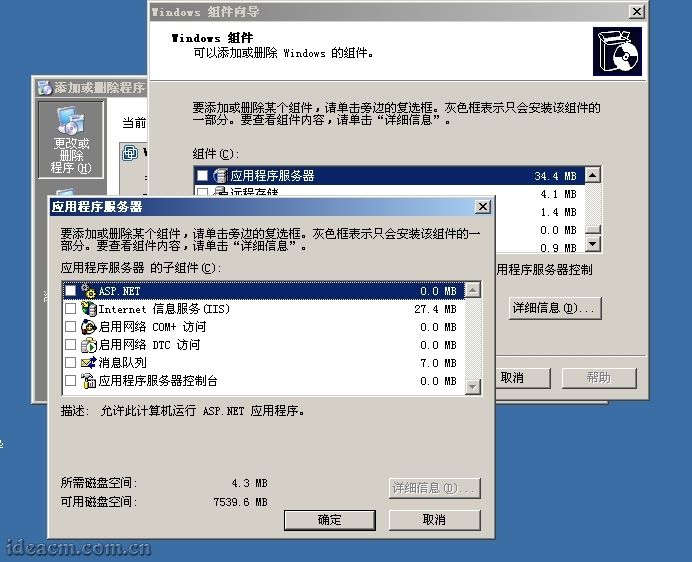
【图九】
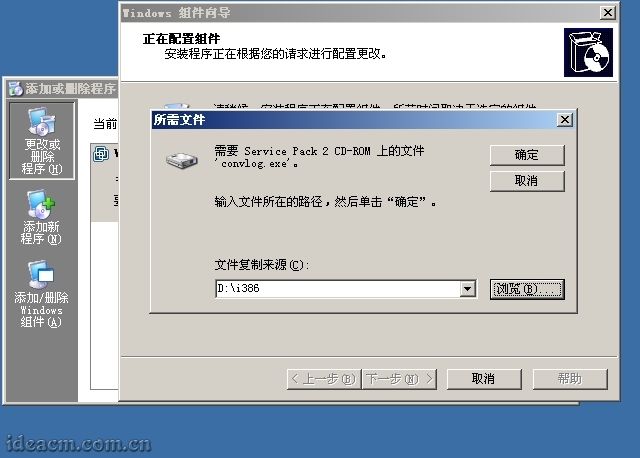
【图十】
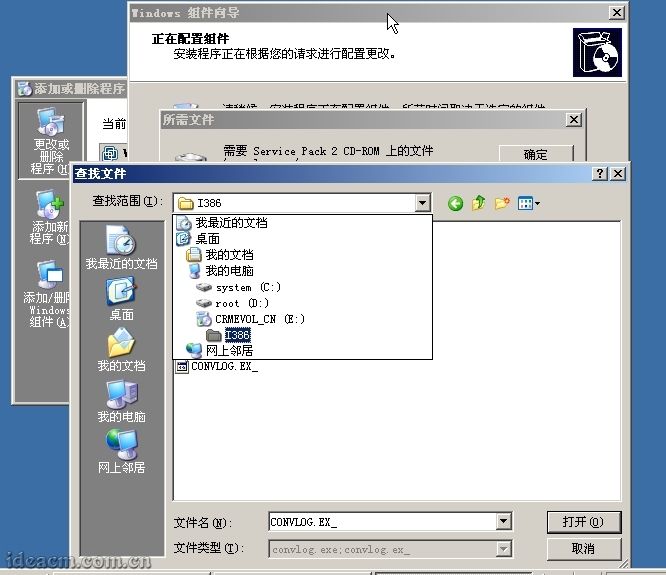
【图十一】
【图十二】
【图十三】
【图十四】
【图十五】
第三步、配置IIS使其支持PHP
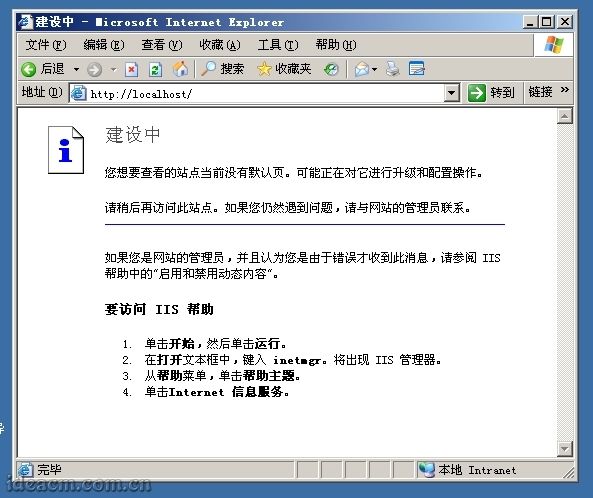
3.3.1、打开浏览器,输入: http://localhost 即可正常访问,看到“建设中”类似文字的页面 【图十六所示】。
【图十六】
3.3.2、PHP支持CGI和ISAPI两种安装模式,CGI更消耗资源,容易因为超时而没有反应,但实际上是比较安全的;ISAPI负载能力强,节省资源,但是安全性略差于CGI模式,这里推荐使用ISAPI模式。所以这里只介绍ISAPI模式配置方法。
3.3.3、 打开“Internet 信息服务(IIS)管理器”(在开始-运行输入:inetmgr,回车确定;或者上面提到的点击管理工具里面的图标)
点击“(计算机名)(本地计算机)”前面的“+”,展开树形目录。【图十七所示】
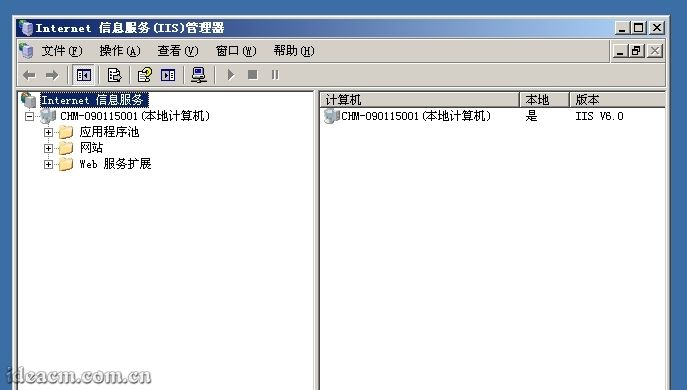
【图十七】
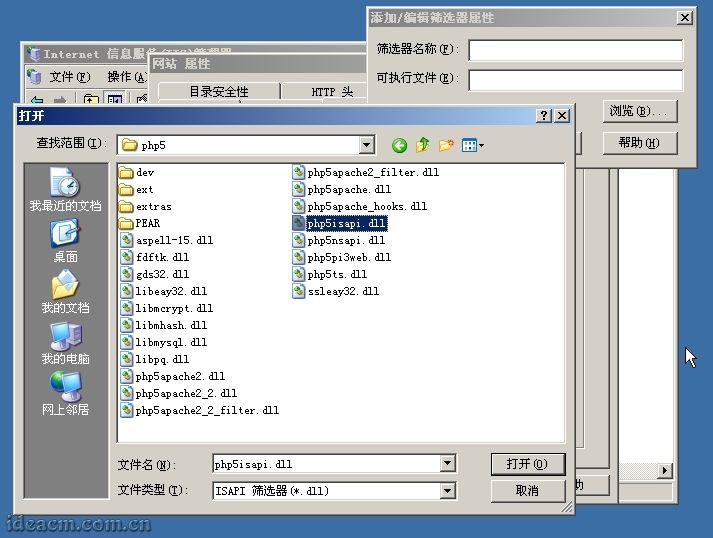
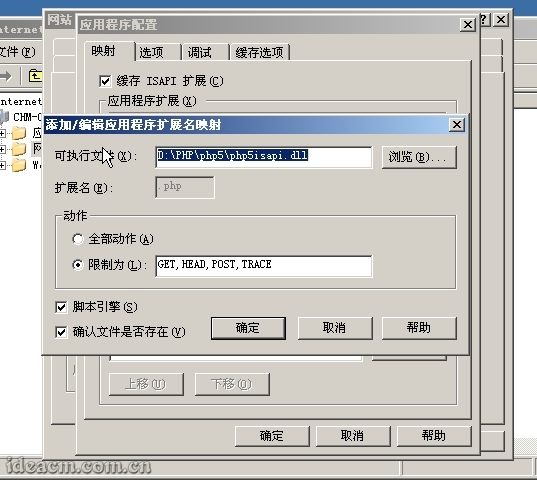
3.3.4、在“网站”上点击鼠标右键,查看“属性”,点击“ISAPI筛选器”选项卡,并点击“添加”按钮,在弹出的“添加/编辑筛选器属性”面板中的“筛选器名称”栏目中输入:PHP,再点击“可执行文件”下面的“浏览”按钮,选择php5isapi.dll文件(按照前面的设置这里的路径应该是D:\PHP\php5\php5isapi.dll),点击打开按钮【图十八所示】,使“可执行文件路径”指向到该文件。点击“确定”按钮;然后再点击“主目录”选项卡,找到并点击“配置”按钮,在弹出的“应用程序配置”面板中的“应用程序扩展”选项卡找到并点击“添加”按钮新增一个扩展名映射,再点击“可执行文件”后面的“浏览”按钮,选择php5isapi.dll文件(按照前面的设置这里的路径应该是D:\PHP\php5\php5isapi.dll),在“扩展名”栏目输入:.php,动作限制为:GET,HEAD,POST,TRACE,将“脚本引擎”、“确认文件是否存在”两项勾选中【图十九所示】(如果还想支持诸如.php5、.phtml等扩展名的PHP文件,可重复“添加”步骤,对应扩展名设置为需要的即可),然后点击确定按钮(添加/编辑应用程序扩展名映射面板),点击“选项”,把“启用父路径”勾选中,然后一路点击确定按钮。
这一步操作将使你服务器IIS下的所有站点都支持你所添加的PHP扩展文件,如果你只需要部分站点支持PHP,只需要在你需要支持PHP的Web站点(展开“网站”目录及可见)比如“默认网站”上单击右键选择“属性”,在打开的“默认网站的属性”“主目录”选项卡中做如上的“添加/编辑应用程序扩展名”操作即可,或者将你不需要支持PHP的站点中的.php扩展名映射删除即可。
【图十八】
【图十九】
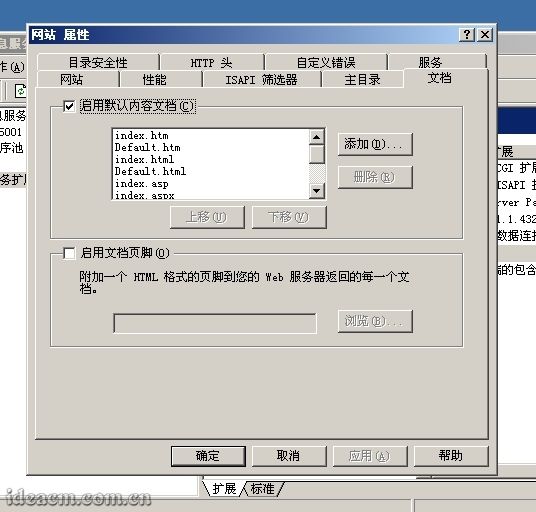
3.3.5、打开“网站”属性中的“文档”选项卡,把“启用默认内容文档”列表中添加index.php和Default.php项,也可以将其上移到最前面两个,这样,访问站点时就会首先寻找并打开index.php、Default.php文档。 【图二十所示】
【图二十】
3.3.6、设置好默认内容文档后,点击应用按钮,会弹出一个“继承覆盖”对话框,点击全选按钮,再点击确定-确定。
3.3.7、点击“Web服务扩展”,点击其中的“添加一个新的Web服务扩展”,在弹出的窗口中,扩展名栏目填写PHP,点击添加按钮,在添加文件的对话框中文件路径栏目中浏览选择上面提到的php5isapi.dll文件,点击确定,勾选“设置扩展状态为允许”,点击确定。
3.3.8、 完成以上操作后,需要重启IIS服务。
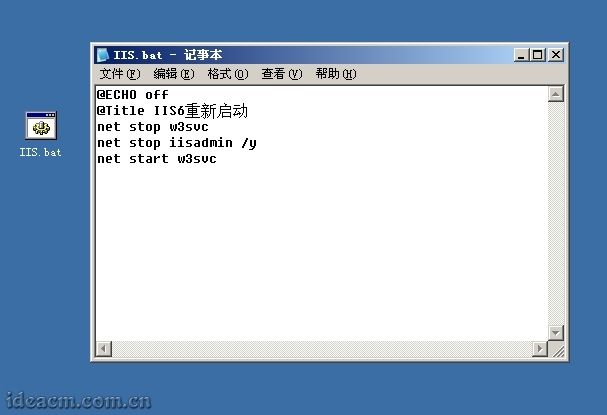
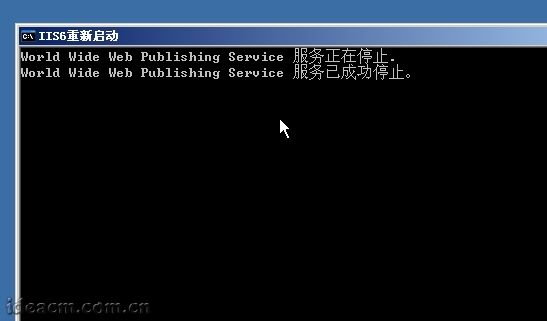
将以下命令命名为IIS.bat文件保存在桌面上【图二十一所示】,双击运行即可重启IIS服务【图二十二所示】,重启好后该窗口会自动关闭。
【图二十一】
【图二十二】
3.3.9、 到此,PHP的基本配置以及完成,IIS中的网站已经可以支持PHP脚本了。
打开默认网站所指向的文件夹(IIS管理器中网站下面的默认网站上面点击属性,查看主目录,即可在本地路栏目中看到该默认网站的所在文件夹),建立一个test.php文件,文件中内容如下:
3.3.10、打开浏览器输入: http://localhost/test.php ,将会显示本服务器所支持PHP的全部信息,可以看到PHP版本为 5.2.8,Server API的模式为: ISAPI 【图二十三所示】。
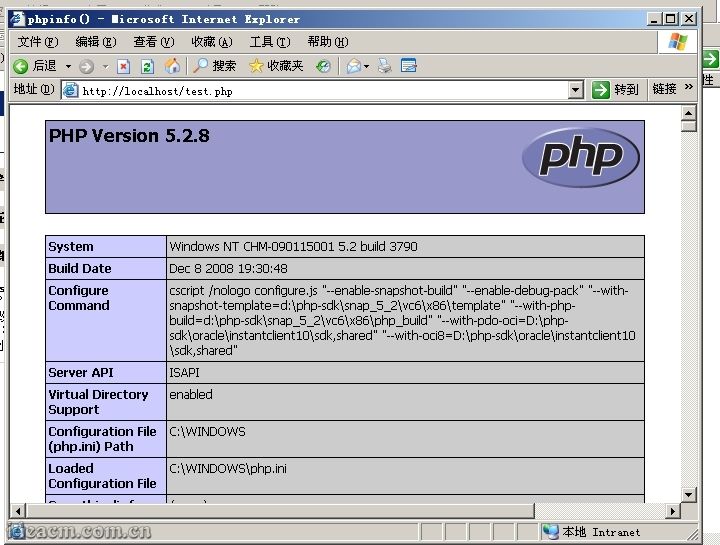
【图二十三】
3.3.11、或者利用PHP探针检查(一个带有具体、直观PHP环境配置检测的php文件,下载链接: http://ideacm.com.cn/read.php?11),下载后解压到网站根目录下访问即可 【图二十四所示】。
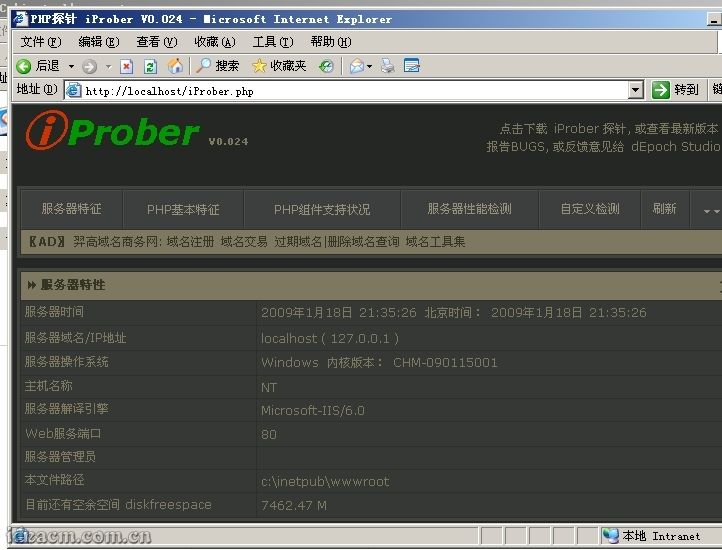
【图二十四】
第四步、安装MySQL【安装前必须保证您的服务器中没有任何版本的mysql或mysql目录】
3.4.1、解压下载下来的mysql-5.0.67-win32.zip压缩包文件后,双击运行Setup.exe 【图二十五所示】
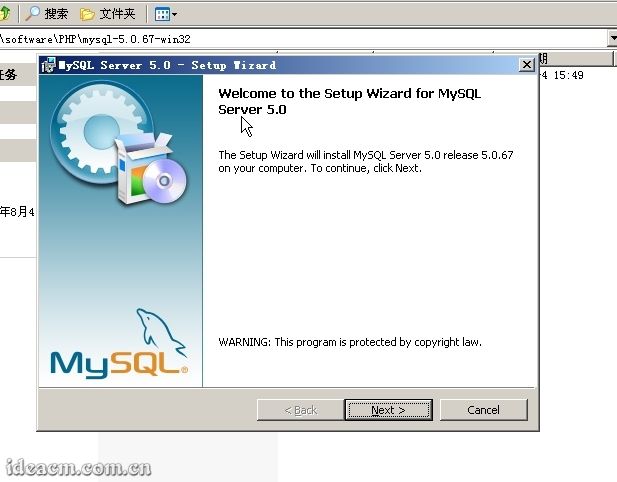
【图二十五】
3.4.2、这里是安装欢迎界面,点击 [Next>]开始下一步安装。默认是 Typical,建议改成 Custom, 因为Typical模式不允许改变安装路径,只能安装在C盘。选中 Custom选项, 【图二十六所示】。
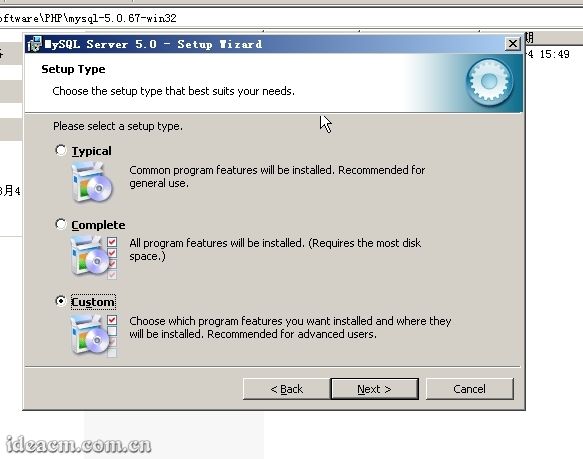
【图二十六】
3.4.3、点击 [Next>] 【图二十七所示】
【图二十七】
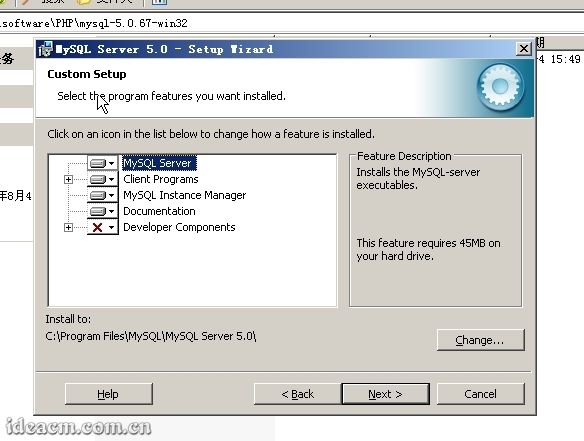
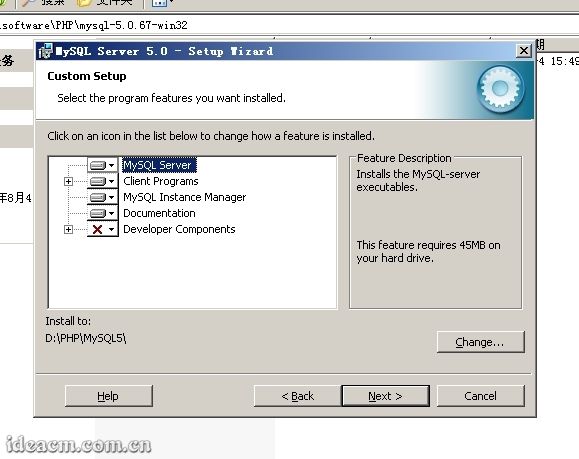
3.4.4、到这一步,需要选择组件及更改文件夹位置,组件就用默认的,文件夹位置可以选择 Change来改变, 这里建议路径设为 D:\PHP\MySQL5\(也可以选择其它磁盘进行安装)( 注意:安装mysql的路径中,不能含有中文!)。 【图二十八所示】
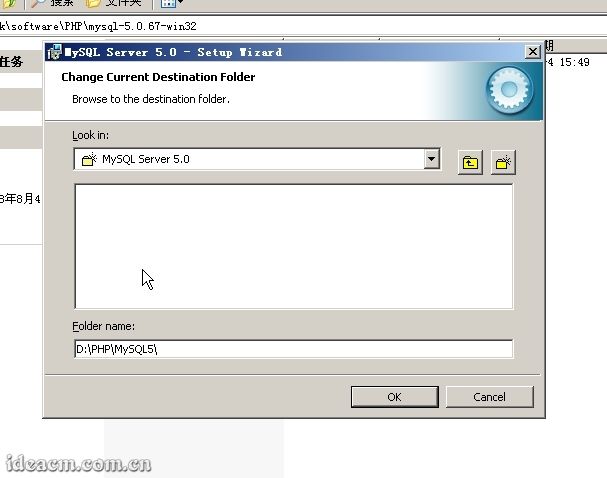
【图二十八】
3.4.5、点击 [OK] 【图二十九所示】
【图二十九】
3.4.6、点击 [Next>] 【图三十所示】
【图三十】
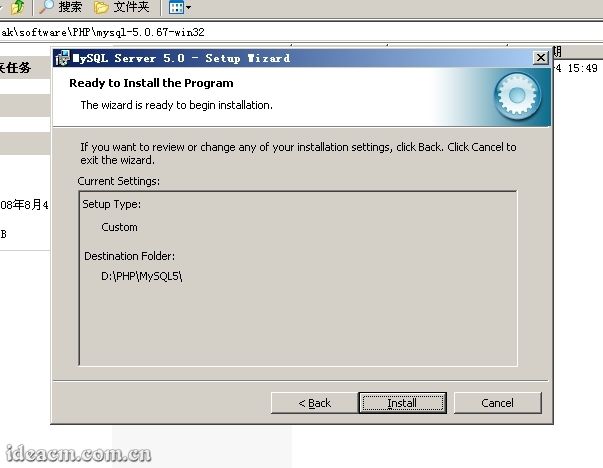
3.4.7、一切就绪,点击 [Install]开始安装。 【图三十一所示】
【图三十一】
3.4.8、这里结束后,点击 [Next>]、 [Next>],如 【图三十二所示】,默认选中现在开始配置MySQL服务器。点击 [Finish]继续。
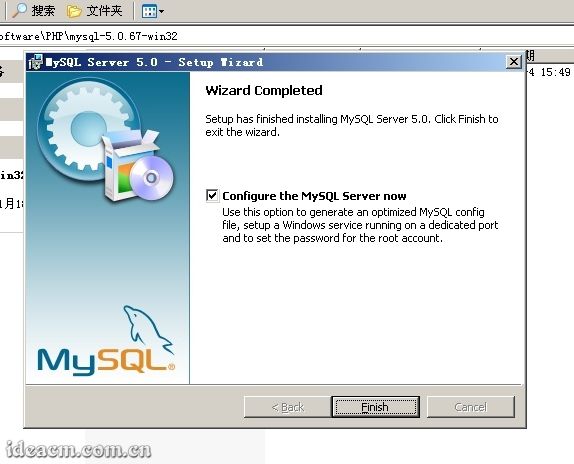
【图三十二】
3.4.9、配置开始,点击 [Next>]继续。 【图三十三所示】
【图三十三】
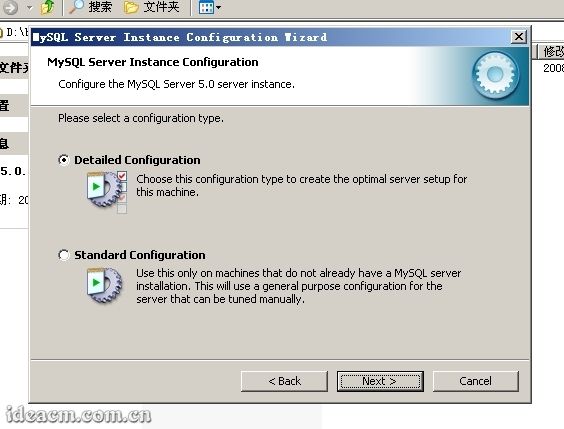
3.4.10、选择 Detailed Configuration 【图三十四所示】
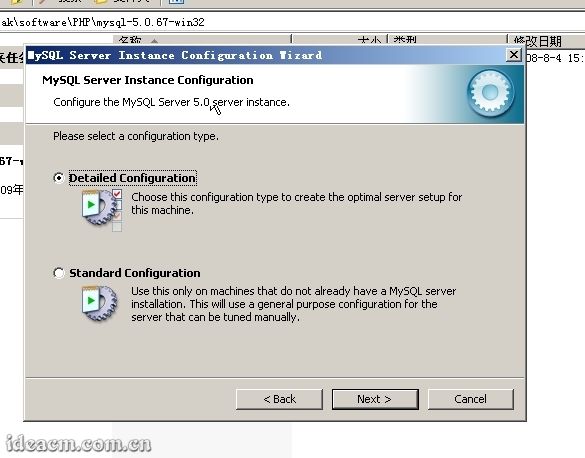
【图三十四】
3.4.11、点 [Next>]继续 【图三十五所示】
这个选项是选择mysql应用于何种类型,第一种是开发服务器,将占用尽量少的内存,第二种是普通web服务器,将占用中等数量内存,最后一种是这台服务器上面只跑mysql数据库,将占用全部的内存,这里选择第二项,你可根据自己的需求,选择其它选项。
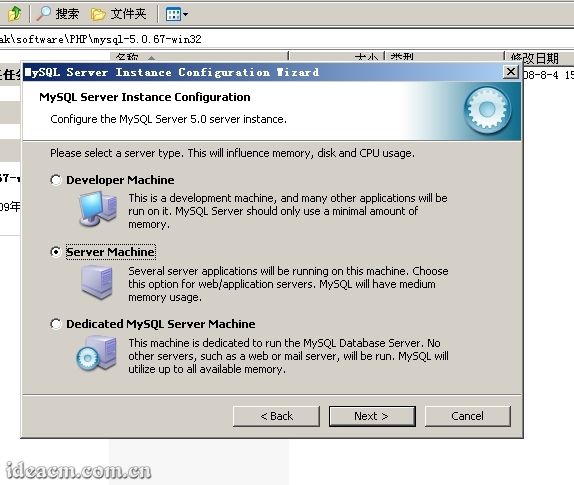
【图三十五】
3.4.12、点击 [Next>]继续 【图三十六所示】
这里是选择数据库用途,第一种是多功能用途,将把数据库优化成很好的 InnoDB存储类型和高效率的 MyISAM存储类型,第二种是只用于事务处理类型,最好的优化 InnoDB,但同时也支持 MyISAM,最后一种是非事务处理类型,适合于简单的应用,只有不支持事务处理的 MyISAM类型是被支持的。 一般选择第一种多功能的。
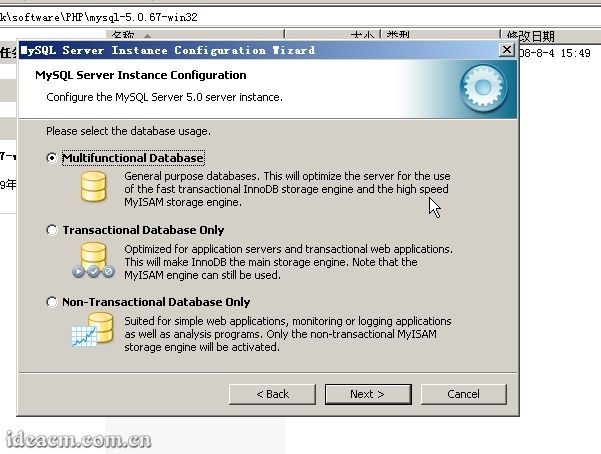
【图三十六】
3.4.13、点击 [Next>]继续 【图三十七所示】
这里是选择 InnoDB的数据存放位置,一般默认好了,不需要改动。
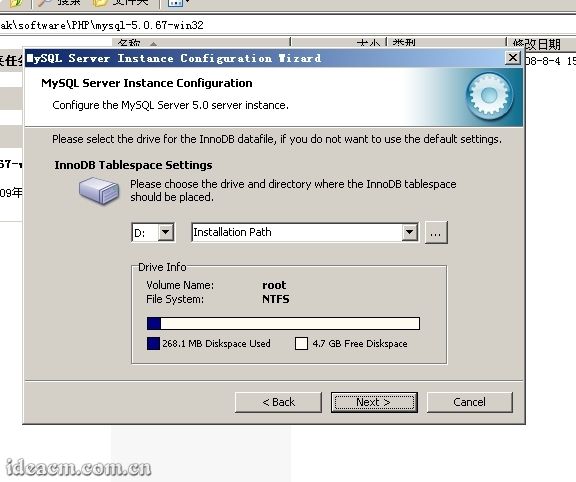
【图三十七】
3.4.14、点击 [Next>]继续 【图三十八所示】
这里是选择mysql允许的最大连接数,第一种是最大20个连接并发数,第二种是最大500个并发连接数,最后一种是自定义,你可以根据自己的需要选择。这里我选择第三项自定义,输入20(你可以根据你的具体需求选择或者输入)。
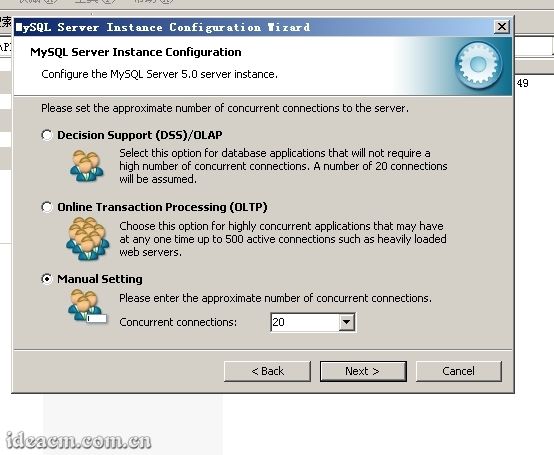
【图三十八】
3.4.15、点击 [Next>]继续 【图三十九所示】
这里是选择数据库监听的端口,一般默认是 3306, 如果改成其它端口,以后连接数据库的时候都要记住修改的端口,否则不能连接mysql数据库,建议不作修改,用mysql的默认端口:3306。
将端口设置后面的“ Add firewall exception for this port”勾选中,如果你开启了 Windows防火墙,将自动把这里设置的端口( 3306)排除在外(允许连接网络)( 如果你没有开启Windows防火墙这里就不要勾选,Windows server 2003 正版默认是没有开启的)。
下面的 Enable Strict Mode勾去掉,改为不选。 【图四十所示】
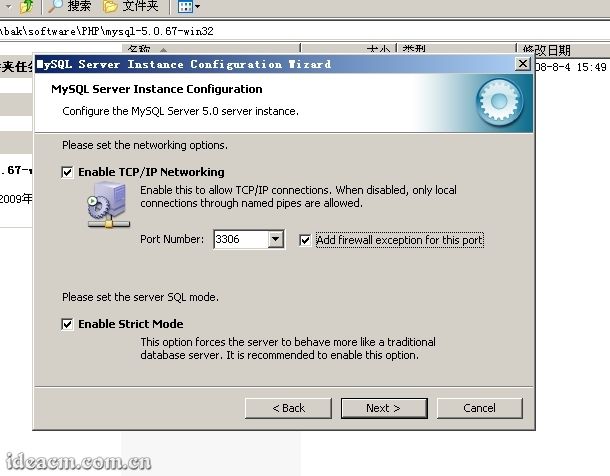
【图三十九】
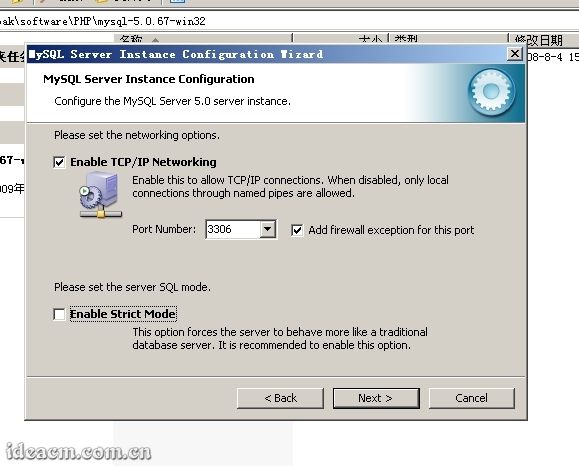
【图四十】
3.4.16、点击 [Next>]继续 【图四十一所示】
这一步设置mysql的默认编码,默认是 latin1,建议选择第三项自定义,把它改成 utf8。
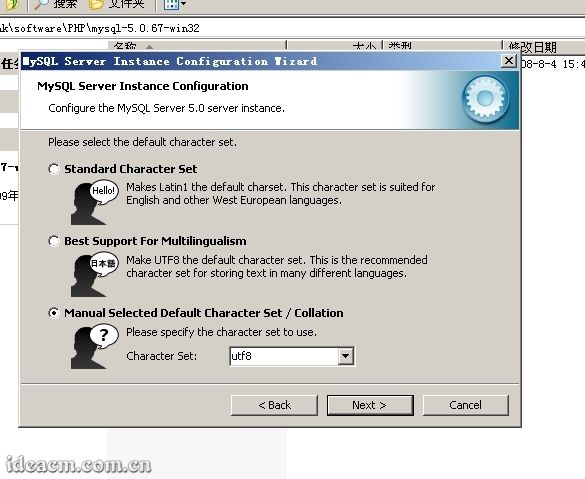
【图四十一】
3.4.17、点击 [Next>]继续 【图四十二所示】
这一步把mysql设置成windows的服务, service name是命名MySQL的服务名称,下面的 launch the mysql server automatically勾选中表示,该服务为自动运行。这样以后就可以通过windows服务启动和关闭mysql数据库了。
然后把下面的 Include Bin Directory in Windows PATH勾选中(这个表示 自动修改 环境变量,在 PATH的值中增加 ../bin目录)。

【图四十二】
3.4.18、点击 [Next>]继续 【图四十三所示】
这一步是设置mysql的超级用户密码, 这个超级用户非常重要,对mysql拥有全部的权限,设置的密码一定要记好。
在两个输入框中( New root password、 Confirm)把要设置的密码分别输入两次。
出于安全考虑,一般不要选“Enable root access from remote machines”,允许数据库外连是很危险的。
“ Create An Anonymous Account”是创建一个匿名帐号,这样会导致未经授权的用户非法访问你的数据库,有安全隐患, 建议不要勾选。
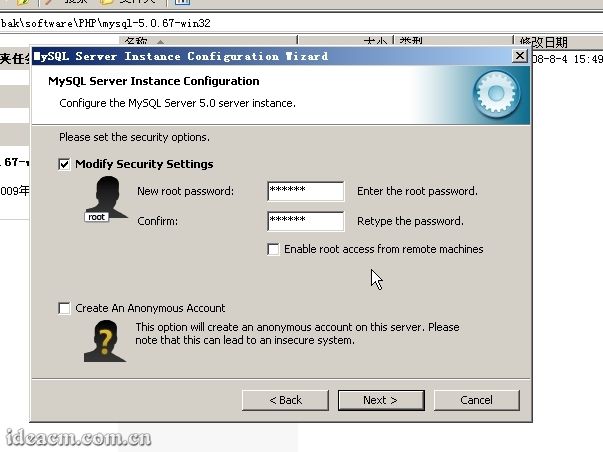
【图四十三】
3.4.19、点击 [Next>]继续 【图四十四所示】
到这一步,mysql数据库已经得到了足够的配置条件
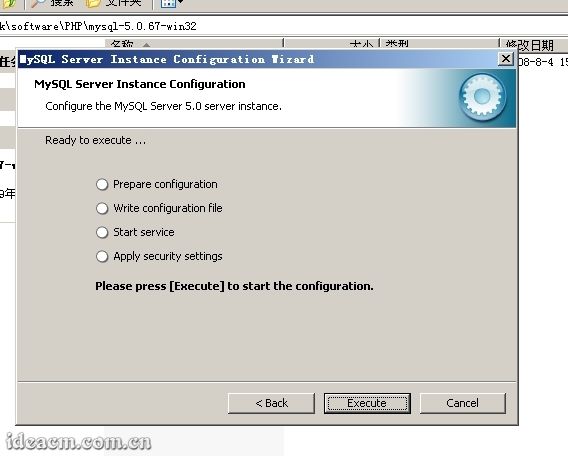
【图四十四】
3.4.20、点击 [Execute]开始执行之前设置的MySQL配置,使其生效。 【图四十五所示】
点击 [Finish]完成安装。
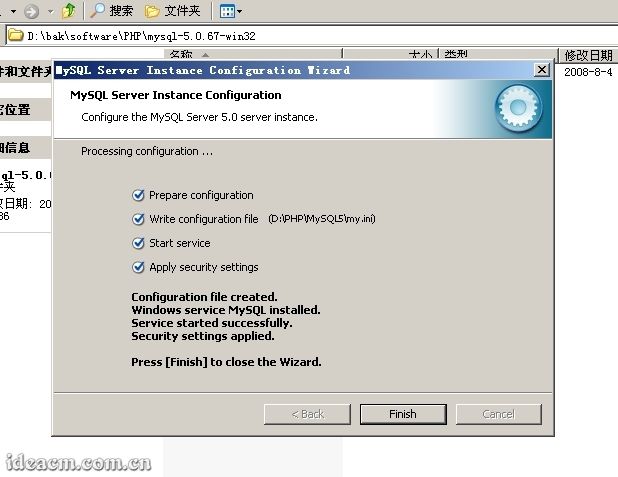
【图四十五】
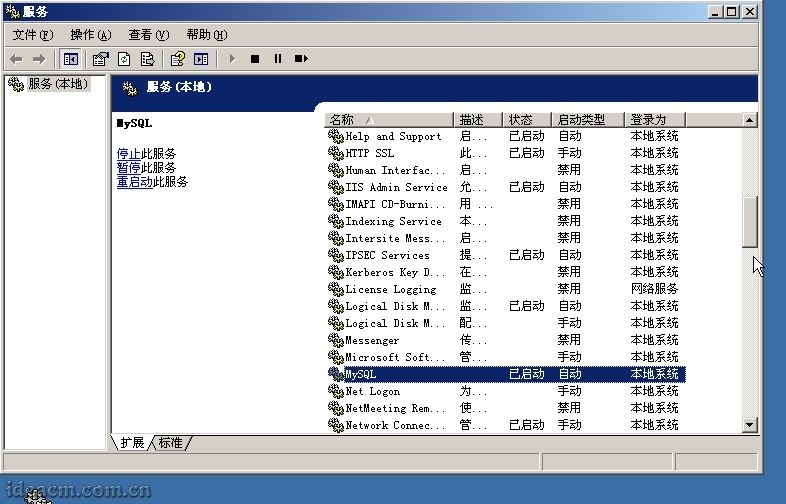
3.4.21、查看“ 控制面板”的“ 管理工具”中, “ 服务”是否有“ MySQL”进程 【图四十六所示】
【图四十六】
3.4.22、关于MySQL的进一步优化设置可以参考相关资料,或者浏览这个网址: http://ideacm.com.cn/read.php?13
MySQL安装完成
第五步、安装Zend Optimizer
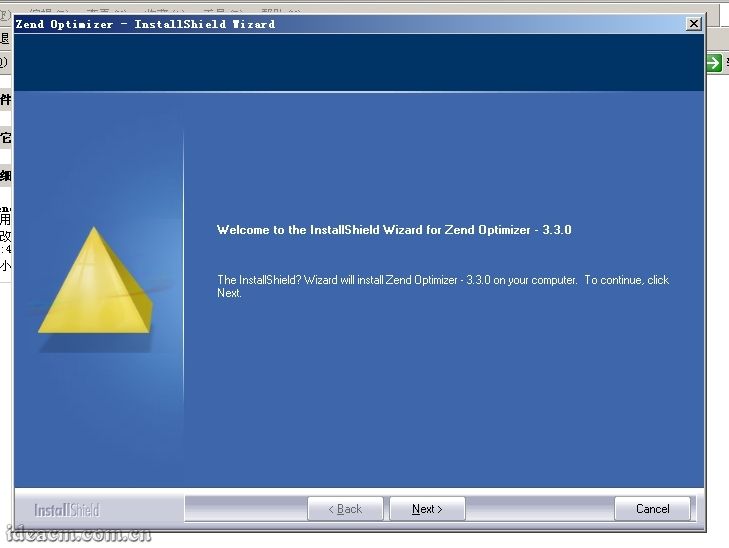
3.5.1、直接双击下载得到的 ZendOptimizer-3.3.3-Windows-i386.exe,运行安装程序 【图四十七所示】
【图四十七】
3.5.2、 单击 [Next>]继续 【图四十八所示】
选择“ I accept the terms of the license agreement”同意许可协议。

【图四十八】
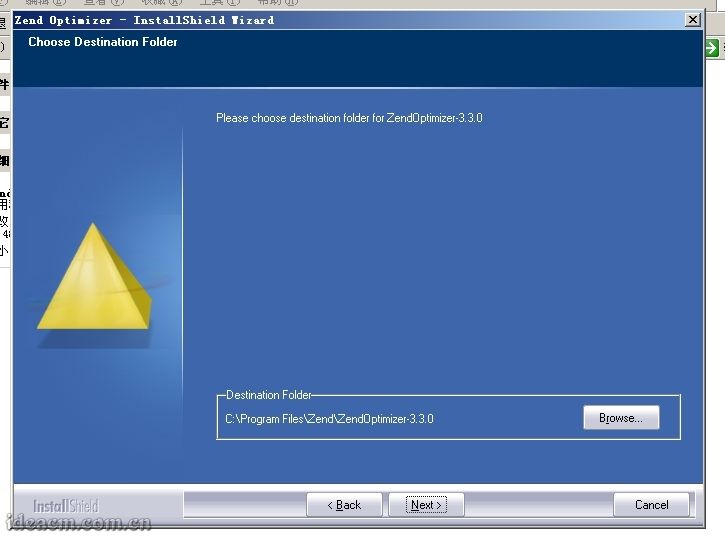
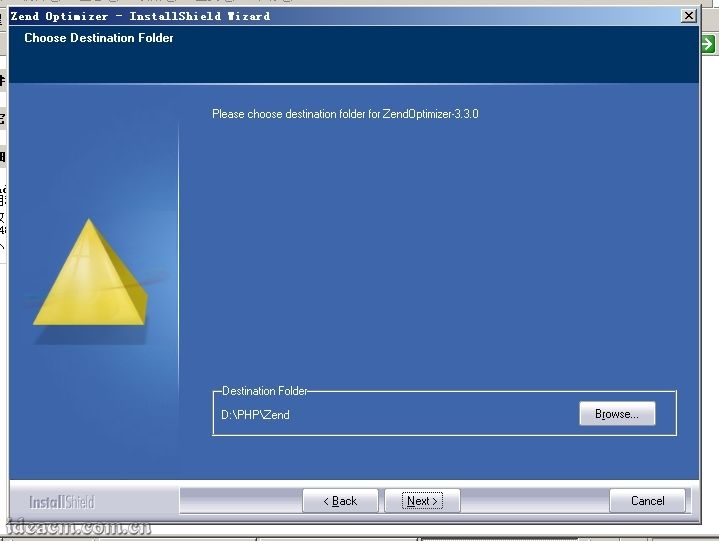
3.5.3、 点击 [Next>]继续 【图四十九所示】
这里是选择Zend所在在的位置,按照本文前面规则,将Zend安装路径修改为 D:\PHP\Zend 。 【图五十所示】
【图四十九】
【图五十】
3.5.4、 点击 [Next>]继续 【图五十一所示】
这里选择你的Web服务器版本,因为我们这里是需要在IIS中配置,且之前已经安装好了IIS,所以这里默认已经选择了第一项 IIS(如果没有默认选择IIS,请手动点击选择)。
【图五十一】
3.5.5、 点击 [Next>]继续 【图五十二所示】
选择PHP的配置文件 php.ini所在目录,这里自动 默认路径为Windows系统所在目录(C:\Windows,如果你的系统装在D盘,那这里就应该输入D:\Windows),如果这里的默认路径不是Windows系统所在目录请手动修改。
【图五十二】
3.5.6、 点击 [Next>]继续 【图五十三所示】
这里是选择你的网站所在目录,这里你可以根据自己的默认站点目录来选,也可以直接选择到 D:\PHP\Zend,为了规范网站目录结构,我这里把预备建立的网站都放在 D:\webroot目录下,所以我把的路径修改为 D:\webroot 【图五十四所示】
【图五十三】

【图五十四】
3.5.7、 点击 [Next>]继续 【图五十五所示】
这个界面是前面一步步的设置预览,如果前面设置有误需要修改的,点击 [<Back]按钮返回,按照需求修改。如果确认没有问题,就直接点击 [Install]按钮进行安装。
【图五十五】
3.5.8、点击 [Install]按钮后会弹出一个对话框,大意就是在接下来的安装过程中需要关闭IIS服务,直到安装过程完成,点击“ 是(Y)”同意执行,点击“ 否(N)”拒绝执行,这里点击“ 是(Y)”。 【图五十六所示】
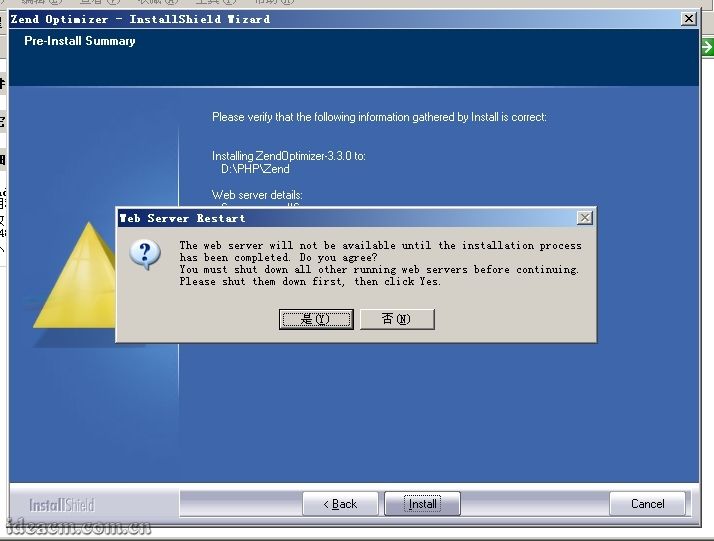
【图五十六】
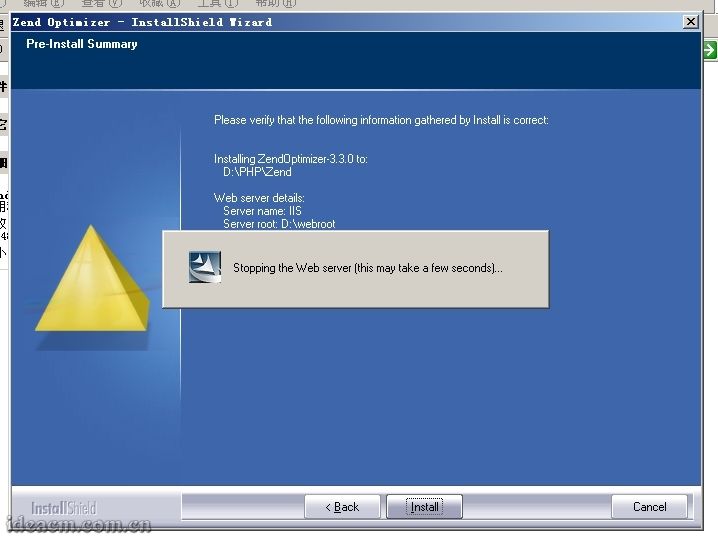
3.5.9、 正在停止Web server(IIS) 【图五十七所示】
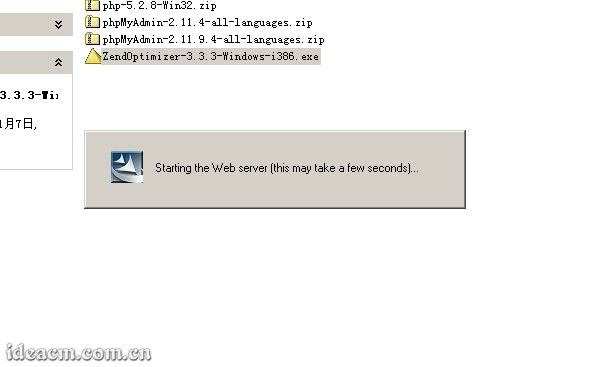
Zend安装好后,自动开启Web Server(IIS) 【图五十八所示】
【图五十七】
【图五十八】
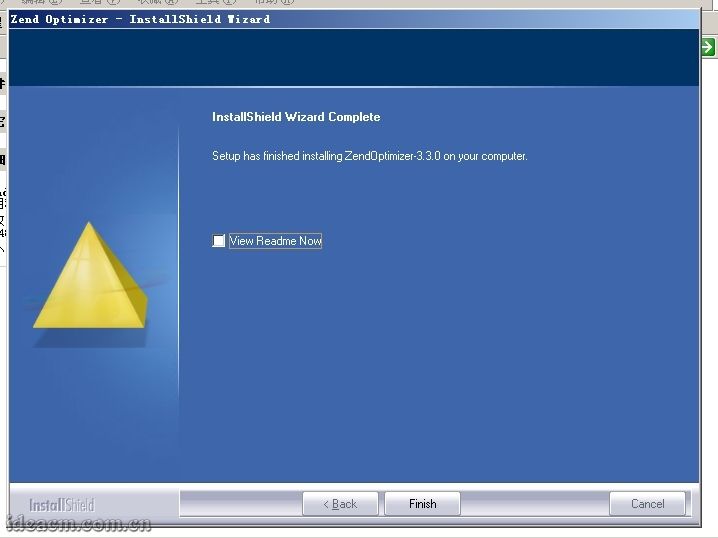
3.5.10、整个zend安装过程完成,去掉“ View Readme Now”查看说明文件前面的勾,点击 [Finish]按钮,完成安装。 【图五十九所示】
【图五十九】
3.5.11、关于Zend Optimizer配置文件的详细说明可以参考相关资料,或者浏览这个网址: http://ideacm.com.cn/read.php?12
第六步、配置phpMyAdmin以便管理MySQL
3.6.1、在 D:\PHP下建立名为 phpMyAdmin的目录,将下载得到的 phpMyAdmin-2.11.9.4-all-languages.zip解压后把其内文件和文件夹复制到里面。 【图六十所示】
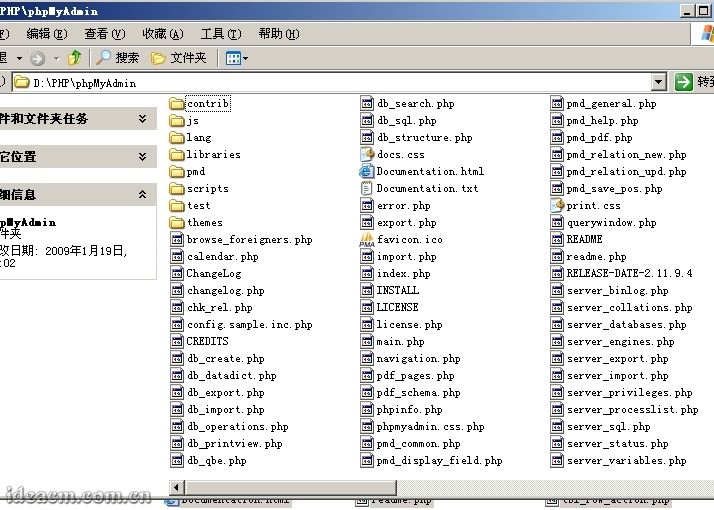
【图六十】
3.6.2、首先打开 Internet 信息服务(IIS)管理器,点击“ +”展开目录树,再展开网站,在 默认网站上点击鼠标右键- 新建- 虚拟目录。 【图六十一所示】
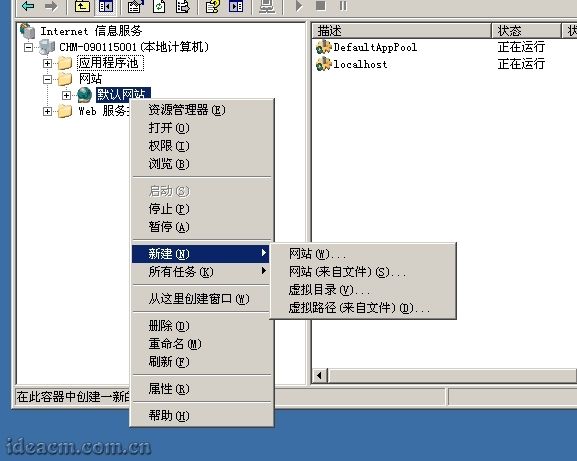
【图六十一】
3.6.3、在弹出的面板中点击 下一步按钮,在别名栏目输入: phpmyadmin 【图六十二所示】

【图六十二】
3.6.4、点击 下一步按钮,路径选择: D:\PHP\phpMyAdmin 【图六十三所示】
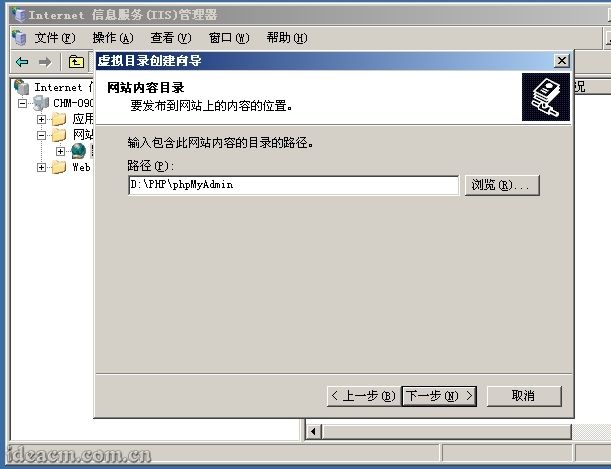
【图六十三】
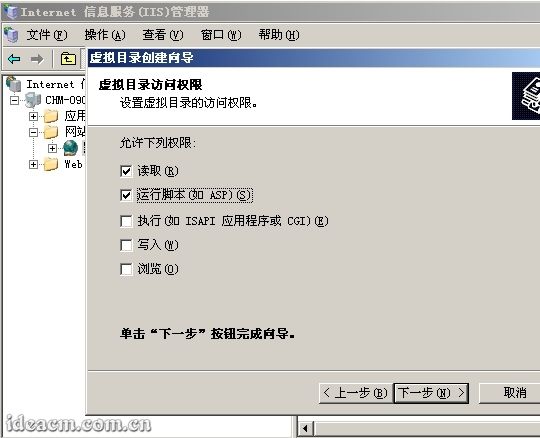
3.6.5、 点击 下一步按钮,勾选“ 读取”、“ 运行脚本(如asp)”这两项 【图六十四所示】,再点击 下一步- 完成。
【这一步的设置可以根据你自己的具体需求建立一个独立网站来作为phpMyAdmin或者在任意你已经建立的网站中建立一个虚拟目录来使用phpMyAdmin】
【图六十四】
3.6.6、 找到并打开 D:\PHP\phpMyAdmin\libraries目录下的 config.default.php文件。
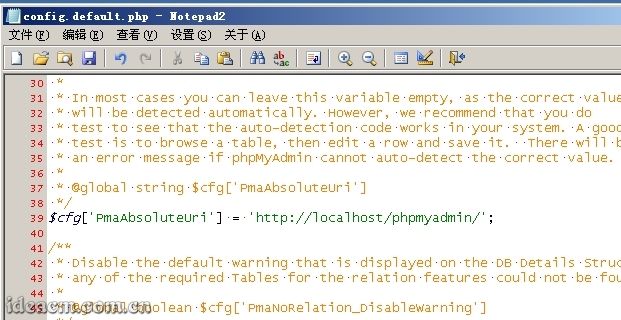
3.6.7、 查找: $cfg['PmaAbsoluteUri'] = '';
这里是设置你的 phpMyAdmin的Web访问地址,根据上一步的设置,我这这里填写的地址是: http://localhost/phpmyadmin/ 【图六十五所示】
$cfg['PmaAbsoluteUri'] = 'http://localhost/phpmyadmin/';
【图六十五】
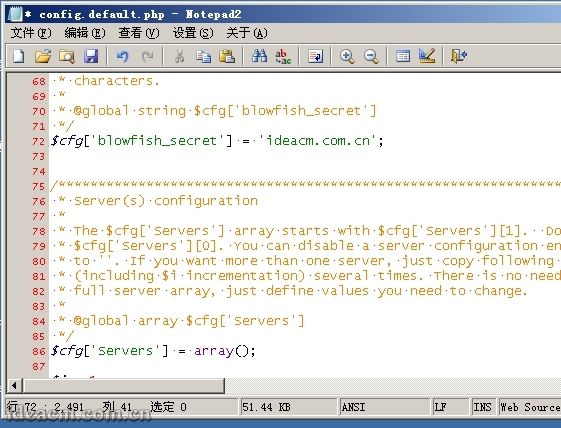
3.6.8、 查找: $cfg['blowfish_secret'] = '';
这里是设置cookie加密密匙,可以设置任意合法字符。我这里设置如: 【图六十六所示】
【图六十六】
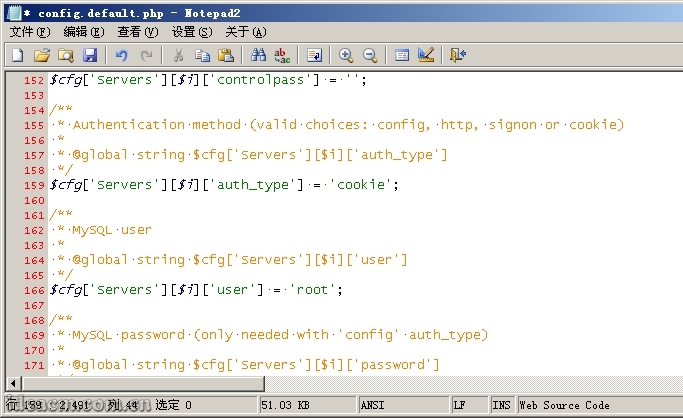
3.6.9、 查找: $cfg['Servers'][$i]['auth_type'] = 'config';
默认 config,如果设置为 config,只需要直接访问phpmyadmin的登录地址,就可以直接管理MySQL了,是不安全的,不推荐。
推荐使用 cookie,将其设置为: $cfg['Servers'][$i]['auth_type'] = 'cookie'; 【图六十七所示】
【图六十七】
3.6.10、如果你一定要设置为 config,请在紧接着下面几行中填写你的MySQL管理帐号 root和 密码。 【图六十八所示】

【图六十八】
3.6.11、查找: $cfg['DefaultLang'] = 'en-iso-8859-1';
将其设置为: $cfg['DefaultLang'] = ' zh-gb2312';
3.6.12、查找: $cfg['DefaultCharset']
将其设置为 $cfg['DefaultCharset'] = 'gb2312';
3.6.13、然后保存关闭。
phpMyAdmin的更丰富的功能,请参考相关资料慢慢熟悉,这里不详细赘述。
第七步、目录权限设置(这里的权限设置仅供参考,根据你的实际需求可做更详细、严格的权限控制,这里不详细赘述。)
3.7.1、 D:\PHP目录设置为 管理员用户组或者 某一个管理员组的帐号、 system完全权限, users组读取和运行权限。
php5、 tmp目录给予 everyone完全控制权限。
MySQL5、 Zend继承上级PHP目录权限即可。
phpMyAdmin在继承上级PHP目录权限的基础上, 增加一个Internet来宾帐户读取和运行的权限。
四、配置完成,通过打开phpMyAdmin监测刚才的配置是否正确
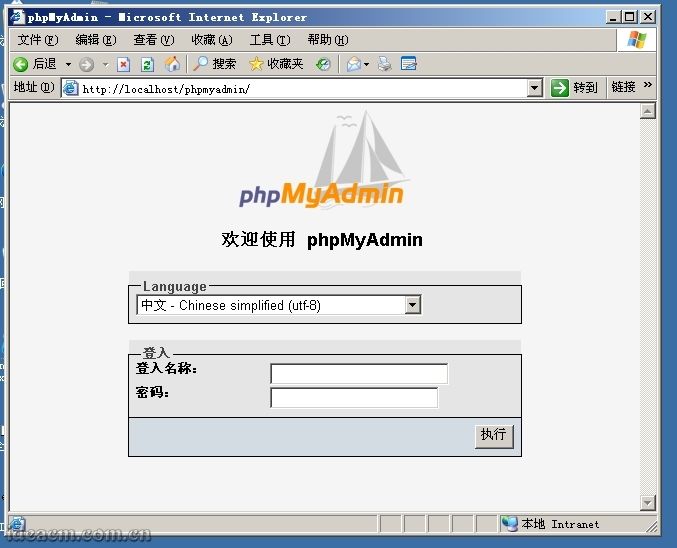
4.1、 双击桌面上的IIS.bat文件重启IIS服务器,然后再在浏览器地址栏输入:
http://localhost/phpmyadmin
将会出现phpMyAdmin的登录界面 【图六十九所示】
【图六十九】
4.2、输入MySQL的管理帐号 root和之前配置MySQL过程中设置的root的帐号 密码,点击 执行按钮,即可登陆 phpMyAdmin进行MySQL管理操作。 【图七十所示】
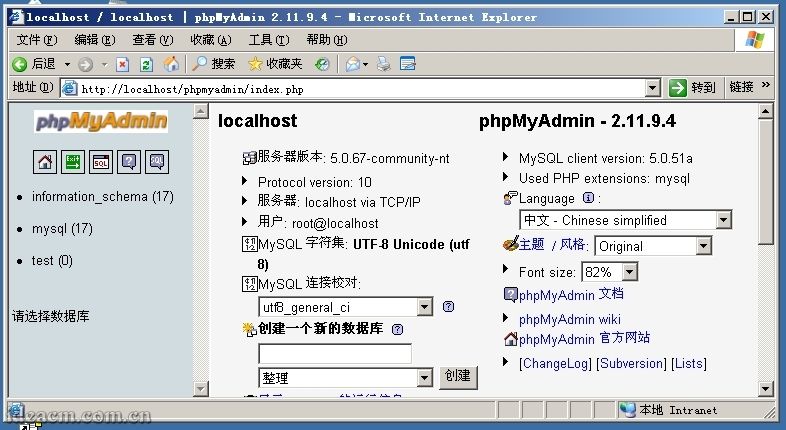
【图七十】
至此,整个环境配置完成。
五、补充说明
5.1 、为了避免在重装服务器系统后重新复制php5目录中的dll文件到系统所在的 C:\windows\system32 目录下,可以将 3.1.2 步骤跳过不要操作,然后鼠标右键点击桌面上的“我的电脑” - 属性 - 高级 - 环境变量 - 系统变量 - 然后找到“ Path ”这个变量,点击编辑,在最后面加上“ ;D:\PHP\php5”(引号内的字符,不包含引号),点击 确定 ,再点击新建,变量名输入“ phpext ”,变量值输入“ D:\PHP\php5\ext ”,点击确定。
5.2 、为了避免倒是部分 php 程序因 session 配置而无法正常使用,可以将 3.1.7 步骤跳过不要操作。
5.3 、把整个配置过程都完成后,重启电脑。
5.4 、如果全部配置完成后,访问 phpmyadmin 出现红色界面的提示,请按照 3.6.6-3.6.13 核对一遍 phpmyadmin 的设置,然后再根据 3.7.1 检查权限设置。
下载地址: http://code.google.com/p/wpmi/downloads/list
操作系统:Windows.Server.2003.R2,Enterprise.Edition,SP2,x86,CHS,VOL,MSDN
本次配置PHP的服务器环境:Windows2003+ IIS6+PHP5+MySQL3+Zend+phpMyAdmin
整个配置过程需要是使用拥有管理员权限的系统帐号登录Windows
在整个配置过程中所示的截图可能根据各使用的系统不同,窗口界面而有所不同,但对应的选项卡栏目是相同的,只需要找到提到的对应选项卡即可。
一、下载相关软件
安装前需要准备的软件(因为我这里用的服务器操作系统是x86版本的,所以以下程序 均为在Windows x86环境下使用的版本)无特殊说明均为 截止到2009年1月16日的最新版:
1、 PHP 推荐PHP 5.2.8的ZIP压缩包版本
PHP 5.2.8 zip package [10,115Kb] - 08 December 2008
MD5:71511834881753ea0906f2bca91632b9
官方下载页面: http://www.php.net/downloads.php
http://cn2.php.net/get/php-5.2.8-Win32.zip/from/a/mirror
直接下载地址: http://cn2.php.net/distributions/php-5.2.8-Win32.zip
2、 MySQL 推荐MySQL 5.0.67 的Windows ZIP/Setup.EXE (x86)版本
MD5:ed76e5ad8b251ca643766c70926854d7
官方下载页面: http://dev.mysql.com/downloads/mysql/5.0.html#win32
http://dev.mysql.com/get/Downloads/MySQL-5.0/mysql-5.0.67-win32.zip/from/pick
直接下载地址: http://mysql.cs.pu.edu.tw/Downloads/MySQL-5.0/mysql-5.0.67-win32.zip
3、 Zend Optimizer 推荐 最新版,现在的最新版是Zend Optimizer v3.3
(虽然下载是免费的,但是要注册用户,才可以下载,为了方便大家的使用,公开我注册好的用户名:ideacmblog密码:ideacm.com.cn,方便大家使用,希望大家在使用这个帐号的时候不要修改密码和用于其它非正当途径)
MD5:f1766065288d509d5286c4c3c7239412
官方下载页面: http://www.zend.com/en/products/guard/downloads
直接下载地址: http://downloads.zend.com/optimizer/3.3.3/ZendOptimizer-3.3.3-Windows-i386.exe
4、phpMyAdmin 在这里不推荐使用最新版,推荐 phpMyAdmin 2.11.9.4 的 phpMyAdmin-2.11.9.4-all-languages.zip版本
MD5:84a4399fdac85f4fbeb0ff68a5a89edd
官方下载页面: http://www.phpmyadmin.net/home_page/downloads.php
直接下载地址: http://nchc.dl.sourceforge.net/sourceforge/phpmyadmin/phpMyAdmin-2.11.9.4-all-languages.zip
二、安装配置前的准备工作
2.1、 先把下载回来的文件使用杀毒软件进行一次病毒扫描,以防意外。 【图一所示】
【图一】
2.2、 好了,现在开始环境配置:
假设操作系统安装在C盘,如果你的系统不是安装在C盘,请将下面提到的盘符自己对应修改。同时,为了避免C盘因为重装系统等各种原因对C盘进行操作, 不建议将PHP相关软件安装在C盘中,这里我把PHP相关程序安装在D:\PHP目录下(这个目录你也可以自己定义,如果你要安装在与此不同路径,请自行修改一下所提到的对应路径)。
三、正式开始环境配置
第一步、安装PHP
3.1.1、 将下载得到的 php-5.2.8-Win32.zip文件解压至 D:\PHP目录中,将得到的二级目录 php-5.2.8-Win32改名为 php5;也可以将 php-5.2.8-Win32.zip解压在默认位置,然后将解压后的文件和文件夹复制到 D:\PHP\php5 【图二所示】。
【图二】
3.1.2、再将 D:\PHP\php5目录下的所有 dll文件复制到 C:\windows\system32下(Windows2000系统为C:\winnt\system32,下同),如果已经有若干同名文件存在,覆盖即可。 【图三、四所示】
【图三】
【图四】
3.1.3、将 D:\PHP\php5目录下的 php.ini-dist复制一份,更名为 php.ini(还是在当前目录中) 【图五所示】,再用文本编辑软件打开这个 php.ini(建议使用Notepad2、EditPlus、UltraEdit等各种支持语法高亮显示的文本编辑软件)。
【图五】
3.1.4、 查找: register_globals = Off (约第419行)
将 Off更改为 On,即得到 register_globals = On ;
注:这个对于PHP的全局变量功能,考虑有很多PHP程序需要全局变量功能所以打开,打开后请注意PHP程序的严谨性,如果不需要全局变量功能,请保持默认Off状态。
再搜索 extension_dir = "./" (约第491行)
将其路径知道你的PHP目录下的扩展功能目录中,这里PHP5对应修改为 extension_dir = "D:/PHP/php5/ext" 。
再在 D:\PHP下建立文件夹,并命名为 tmp
查找 ;upload_tmp_dir =
将 ;upload_tmp_dir =该行的注释符,即前面的分号” ;”去掉,使该行在 php.ini文档中起作用。
upload_tmp_dir是用来定义上传文件存放的临时路径,在这里你还可以修改并给其定义一个决定路径,需要注意的是,这里设置的目录必须有读、写权限。
这里我设置为 upload_tmp_dir = D:/PHP/tmp (这里就是我前面建立的文件夹)
3.1.5、 搜索 ; Windows Extensions,定位到 php.ini文件的约 604行,将下面列出的常用扩展前面的分号注释符去掉:
| ; extension=php_curl.dll ; extension=php_dbase.dll ; extension=php_gd2.dll ; extension=php_ldap.dll ; extension=php_mbstring.dll ; extension=php_exif.dll |
特别提示: Exif扩展是用来显示图片的exif信息的,因该扩展需要mbstring支持,所以将extension=php_exif.dll这一行移动到extension=php_mbstring.dll一行的下面。
| ; extension=php_mcrypt.dll ; extension=php_ming.dll ; extension=php_mysql.dll ; extension=php_sockets.dll ;extension=php_xmlrpc.dll ; extension=php_zip.dll |
3.1.6、 查找: ;date.timezone =
去掉前面的分号注释符,这里将其设置为 date.timezone = PRC
| 关于时区设定的说明: 从php5.1.0开始,php.ini里加入了date.timezone这个选项,默认情况下是关闭的,也就是显示的时间(无论用什么php命令)都是格林威治标准时间,和我们的时间(北京时间)差了正好8个小时,有以下2种方法可以恢复正常的时间。 1、如果要用5.1以上版本,而且不修改php.ini,则需要在关于时间的初始化的语句的上面加上date_default_timezone_set (XXX),或者使用date('Y-m-d G:i:T', strtotime('+8HOUR') )来获取日期时间; 2、一劳永逸,仅限能修改php.ini。打开php.ini把date.timezone前面的分号去掉,在=后面加XXX,重启http服务(如apache2或iis等)即可。 关于XXX,大陆内地可用的值是:Asia/Chongqing、Asia/Shanghai、Asia/Urumqi(依次为重庆,上海,乌鲁木齐),港台地区可用:Asia/Macao、Asia/Hong_Kong、Asia/Taipei(依次为澳门,香港,台北),还有新加坡:Asia/Singapore,以上没有北京,不过接着往下看,其他可用的值是:Etc/GMT-8,Singapore ,Hongkong,PRC(中华人民共和国)。 |
3.1.7、 查找 :;session.save_path = "/tmp"
将前面的分号注释符去掉,这里将其设置为 session.save_path = "D:/PHP/tmp" (这里就是我前面建立的文件夹)
3.1.8、 如果你有遇到无法上传较大文件或者运行某些程序经常超时,那么可以修改以下内容来调整相关限额:
在大约第 255行,
max_execution_time = 30 ; 这个是每个脚本运行的最长时间,根据你的需求更改数值,单位秒
max_input_time = 60 ; 这是每个脚本可以消耗的时间,根据你的需求更改数值,单位也是秒
大约第 258行,
memory_limit = 128M ; 这个是脚本运行最大消耗的内存,根据你的需求更改数值。
大约第 552行,
upload_max_filesize = 2M
上载文件的最大许可大小 ,根据你的需求更改数值,M是单位:兆。
3.1.9、 php.ini文件中基本就是作如上修改,其他的你可以根据自己的具体需求修改,然后将该文件保存,再复制一份到 C:\Windows下面。
第二步、安装IIS
3.2.1、打开“ 添加或删除程序”面板 【图六所示】
| 以下两种方法均可打开“添加或删除程序”面板: 1、 点击“开始”-“控制面板”-“添加/删除程序”; 2、 直接在“开始”-“运行”中输入:Appwiz.cpl (回车确定) |
【图六】
3.2.2、点击“ 添加/删除Windows组件(A)” 【图七所示】
【图七】
3.2.3、可见“Windows组件向导” 【图八所示】
【图八】
3.2.4、拖动面板里面的右边滚动条,直到看到“ 应用程序服务器”,在其前面复选框点击选中,然后点击“ 详细信息”,再点击“ ASP.NET”前面的复选框,再在“ Internet信息服务(IIS)”上点击一下(当前这里的复选框是已经选择的,这里在其文字上点击,不是点击签名的复选框),再点击“ 详细信息(D)”在打开的面板中,把右边滚动条往下拖。再在“ 万维网服务”上点击一下,再点击“ 详细信息”。
勾选中“ Active Server Pages”、“ Internet 数据连接器”、“ 在服务器端的包含文件”;“ 万维网服务”已经是被选中状态。
3.2.5、然后点击确定(万维网服务面板)-确定(Internet 信息服务(IIS)面板)-确定(应用程序服务器面板) 【图九所示】-下一步(Windows 组件向导面板),配置过程中会弹出所需文件对话框 【图十所示】,这个时候把本系统的安装光盘插入光驱,点击浏览,选择光驱盘符,进入 i386文件夹,此时会自动显示所需要的文件,直接点击“ 打开” 【图十一所示】,再点击“ 确定” 【图十二、十三所示】,这个时候又会弹出一个“ 所需文件”的对话框,还是按照刚才的步骤,点击“ 浏览”,然后定位到i386文件夹,此时会自动显示所需要的文件,直接点击“ 打开”-“ 确定”,然后等待,直到“ Windows 组件向导”完成界面 【图十四所示】,点击“ 完成”,出现“ Windows 安装程序 请稍候…”的对话框,等待其自动关闭,然后关闭“ 添加或删除程序”面板,在 开始- 控制面板- 管理工具菜单里面即可看见“ Internet 信息服务(IIS)管理器”,这个时候IIS就已经安装好了 【图十五所示】。
【图九】
【图十】
【图十一】
【图十二】
【图十三】
【图十四】
【图十五】
第三步、配置IIS使其支持PHP
3.3.1、打开浏览器,输入: http://localhost 即可正常访问,看到“建设中”类似文字的页面 【图十六所示】。
【图十六】
3.3.2、PHP支持CGI和ISAPI两种安装模式,CGI更消耗资源,容易因为超时而没有反应,但实际上是比较安全的;ISAPI负载能力强,节省资源,但是安全性略差于CGI模式,这里推荐使用ISAPI模式。所以这里只介绍ISAPI模式配置方法。
3.3.3、 打开“Internet 信息服务(IIS)管理器”(在开始-运行输入:inetmgr,回车确定;或者上面提到的点击管理工具里面的图标)
点击“(计算机名)(本地计算机)”前面的“+”,展开树形目录。【图十七所示】
【图十七】
3.3.4、在“网站”上点击鼠标右键,查看“属性”,点击“ISAPI筛选器”选项卡,并点击“添加”按钮,在弹出的“添加/编辑筛选器属性”面板中的“筛选器名称”栏目中输入:PHP,再点击“可执行文件”下面的“浏览”按钮,选择php5isapi.dll文件(按照前面的设置这里的路径应该是D:\PHP\php5\php5isapi.dll),点击打开按钮【图十八所示】,使“可执行文件路径”指向到该文件。点击“确定”按钮;然后再点击“主目录”选项卡,找到并点击“配置”按钮,在弹出的“应用程序配置”面板中的“应用程序扩展”选项卡找到并点击“添加”按钮新增一个扩展名映射,再点击“可执行文件”后面的“浏览”按钮,选择php5isapi.dll文件(按照前面的设置这里的路径应该是D:\PHP\php5\php5isapi.dll),在“扩展名”栏目输入:.php,动作限制为:GET,HEAD,POST,TRACE,将“脚本引擎”、“确认文件是否存在”两项勾选中【图十九所示】(如果还想支持诸如.php5、.phtml等扩展名的PHP文件,可重复“添加”步骤,对应扩展名设置为需要的即可),然后点击确定按钮(添加/编辑应用程序扩展名映射面板),点击“选项”,把“启用父路径”勾选中,然后一路点击确定按钮。
这一步操作将使你服务器IIS下的所有站点都支持你所添加的PHP扩展文件,如果你只需要部分站点支持PHP,只需要在你需要支持PHP的Web站点(展开“网站”目录及可见)比如“默认网站”上单击右键选择“属性”,在打开的“默认网站的属性”“主目录”选项卡中做如上的“添加/编辑应用程序扩展名”操作即可,或者将你不需要支持PHP的站点中的.php扩展名映射删除即可。
【图十八】
【图十九】
3.3.5、打开“网站”属性中的“文档”选项卡,把“启用默认内容文档”列表中添加index.php和Default.php项,也可以将其上移到最前面两个,这样,访问站点时就会首先寻找并打开index.php、Default.php文档。 【图二十所示】
| 什么是默认内容文档: 默认内容文档即默认首页,是指在访问一个文件目录的时候自动定位的一个文件。比如您的主机空间内有许多不同名字的文件,但是您希望在输入网址ideacm.com.cn的时候,默认访问其中一个叫做index.htm的文件,那么您就需要将默认首页设置为index.htm,也可以添加很多个默认内容文档,当访问该站点的时候会自动根据默认内容文档的排序来优先使用。 |
【图二十】
| 在这里我推荐默认内容文档做如下顺序的设置: index.htm Default.html index.html Default.html index.asp Default.asp index.aspx Default.aspx index.php Default.php |
3.3.6、设置好默认内容文档后,点击应用按钮,会弹出一个“继承覆盖”对话框,点击全选按钮,再点击确定-确定。
3.3.7、点击“Web服务扩展”,点击其中的“添加一个新的Web服务扩展”,在弹出的窗口中,扩展名栏目填写PHP,点击添加按钮,在添加文件的对话框中文件路径栏目中浏览选择上面提到的php5isapi.dll文件,点击确定,勾选“设置扩展状态为允许”,点击确定。
3.3.8、 完成以上操作后,需要重启IIS服务。
将以下命令命名为IIS.bat文件保存在桌面上【图二十一所示】,双击运行即可重启IIS服务【图二十二所示】,重启好后该窗口会自动关闭。
| 把以下代码保存为IIS.bat: @ECHO off @Title IIS6重新启动 net stop w3svc net stop iisadmin /y net start w3svc |
【图二十一】
【图二十二】
3.3.9、 到此,PHP的基本配置以及完成,IIS中的网站已经可以支持PHP脚本了。
打开默认网站所指向的文件夹(IIS管理器中网站下面的默认网站上面点击属性,查看主目录,即可在本地路栏目中看到该默认网站的所在文件夹),建立一个test.php文件,文件中内容如下:
| 把以下代码保存为test.php: <?php Phpinfo(); ?> |
3.3.10、打开浏览器输入: http://localhost/test.php ,将会显示本服务器所支持PHP的全部信息,可以看到PHP版本为 5.2.8,Server API的模式为: ISAPI 【图二十三所示】。
【图二十三】
3.3.11、或者利用PHP探针检查(一个带有具体、直观PHP环境配置检测的php文件,下载链接: http://ideacm.com.cn/read.php?11),下载后解压到网站根目录下访问即可 【图二十四所示】。
【图二十四】
第四步、安装MySQL【安装前必须保证您的服务器中没有任何版本的mysql或mysql目录】
3.4.1、解压下载下来的mysql-5.0.67-win32.zip压缩包文件后,双击运行Setup.exe 【图二十五所示】
【图二十五】
3.4.2、这里是安装欢迎界面,点击 [Next>]开始下一步安装。默认是 Typical,建议改成 Custom, 因为Typical模式不允许改变安装路径,只能安装在C盘。选中 Custom选项, 【图二十六所示】。
【图二十六】
3.4.3、点击 [Next>] 【图二十七所示】
【图二十七】
3.4.4、到这一步,需要选择组件及更改文件夹位置,组件就用默认的,文件夹位置可以选择 Change来改变, 这里建议路径设为 D:\PHP\MySQL5\(也可以选择其它磁盘进行安装)( 注意:安装mysql的路径中,不能含有中文!)。 【图二十八所示】
【图二十八】
3.4.5、点击 [OK] 【图二十九所示】
【图二十九】
3.4.6、点击 [Next>] 【图三十所示】
【图三十】
3.4.7、一切就绪,点击 [Install]开始安装。 【图三十一所示】
【图三十一】
3.4.8、这里结束后,点击 [Next>]、 [Next>],如 【图三十二所示】,默认选中现在开始配置MySQL服务器。点击 [Finish]继续。
【图三十二】
3.4.9、配置开始,点击 [Next>]继续。 【图三十三所示】
【图三十三】
3.4.10、选择 Detailed Configuration 【图三十四所示】
【图三十四】
3.4.11、点 [Next>]继续 【图三十五所示】
这个选项是选择mysql应用于何种类型,第一种是开发服务器,将占用尽量少的内存,第二种是普通web服务器,将占用中等数量内存,最后一种是这台服务器上面只跑mysql数据库,将占用全部的内存,这里选择第二项,你可根据自己的需求,选择其它选项。
【图三十五】
3.4.12、点击 [Next>]继续 【图三十六所示】
这里是选择数据库用途,第一种是多功能用途,将把数据库优化成很好的 InnoDB存储类型和高效率的 MyISAM存储类型,第二种是只用于事务处理类型,最好的优化 InnoDB,但同时也支持 MyISAM,最后一种是非事务处理类型,适合于简单的应用,只有不支持事务处理的 MyISAM类型是被支持的。 一般选择第一种多功能的。
【图三十六】
3.4.13、点击 [Next>]继续 【图三十七所示】
这里是选择 InnoDB的数据存放位置,一般默认好了,不需要改动。
【图三十七】
3.4.14、点击 [Next>]继续 【图三十八所示】
这里是选择mysql允许的最大连接数,第一种是最大20个连接并发数,第二种是最大500个并发连接数,最后一种是自定义,你可以根据自己的需要选择。这里我选择第三项自定义,输入20(你可以根据你的具体需求选择或者输入)。
【图三十八】
3.4.15、点击 [Next>]继续 【图三十九所示】
这里是选择数据库监听的端口,一般默认是 3306, 如果改成其它端口,以后连接数据库的时候都要记住修改的端口,否则不能连接mysql数据库,建议不作修改,用mysql的默认端口:3306。
将端口设置后面的“ Add firewall exception for this port”勾选中,如果你开启了 Windows防火墙,将自动把这里设置的端口( 3306)排除在外(允许连接网络)( 如果你没有开启Windows防火墙这里就不要勾选,Windows server 2003 正版默认是没有开启的)。
下面的 Enable Strict Mode勾去掉,改为不选。 【图四十所示】
【图三十九】
【图四十】
3.4.16、点击 [Next>]继续 【图四十一所示】
这一步设置mysql的默认编码,默认是 latin1,建议选择第三项自定义,把它改成 utf8。
【图四十一】
3.4.17、点击 [Next>]继续 【图四十二所示】
这一步把mysql设置成windows的服务, service name是命名MySQL的服务名称,下面的 launch the mysql server automatically勾选中表示,该服务为自动运行。这样以后就可以通过windows服务启动和关闭mysql数据库了。
然后把下面的 Include Bin Directory in Windows PATH勾选中(这个表示 自动修改 环境变量,在 PATH的值中增加 ../bin目录)。
【图四十二】
3.4.18、点击 [Next>]继续 【图四十三所示】
这一步是设置mysql的超级用户密码, 这个超级用户非常重要,对mysql拥有全部的权限,设置的密码一定要记好。
在两个输入框中( New root password、 Confirm)把要设置的密码分别输入两次。
出于安全考虑,一般不要选“Enable root access from remote machines”,允许数据库外连是很危险的。
“ Create An Anonymous Account”是创建一个匿名帐号,这样会导致未经授权的用户非法访问你的数据库,有安全隐患, 建议不要勾选。
【图四十三】
3.4.19、点击 [Next>]继续 【图四十四所示】
到这一步,mysql数据库已经得到了足够的配置条件
【图四十四】
3.4.20、点击 [Execute]开始执行之前设置的MySQL配置,使其生效。 【图四十五所示】
点击 [Finish]完成安装。
【图四十五】
3.4.21、查看“ 控制面板”的“ 管理工具”中, “ 服务”是否有“ MySQL”进程 【图四十六所示】
【图四十六】
3.4.22、关于MySQL的进一步优化设置可以参考相关资料,或者浏览这个网址: http://ideacm.com.cn/read.php?13
MySQL安装完成
第五步、安装Zend Optimizer
3.5.1、直接双击下载得到的 ZendOptimizer-3.3.3-Windows-i386.exe,运行安装程序 【图四十七所示】
【图四十七】
3.5.2、 单击 [Next>]继续 【图四十八所示】
选择“ I accept the terms of the license agreement”同意许可协议。
【图四十八】
3.5.3、 点击 [Next>]继续 【图四十九所示】
这里是选择Zend所在在的位置,按照本文前面规则,将Zend安装路径修改为 D:\PHP\Zend 。 【图五十所示】
【图四十九】
【图五十】
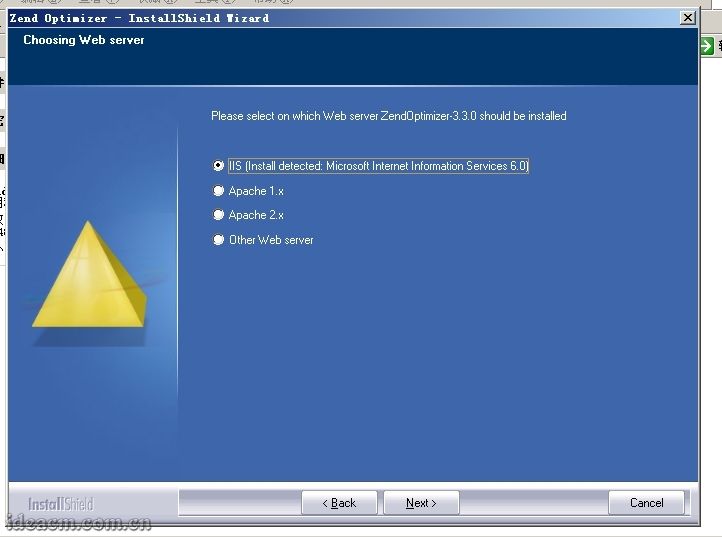
3.5.4、 点击 [Next>]继续 【图五十一所示】
这里选择你的Web服务器版本,因为我们这里是需要在IIS中配置,且之前已经安装好了IIS,所以这里默认已经选择了第一项 IIS(如果没有默认选择IIS,请手动点击选择)。
【图五十一】
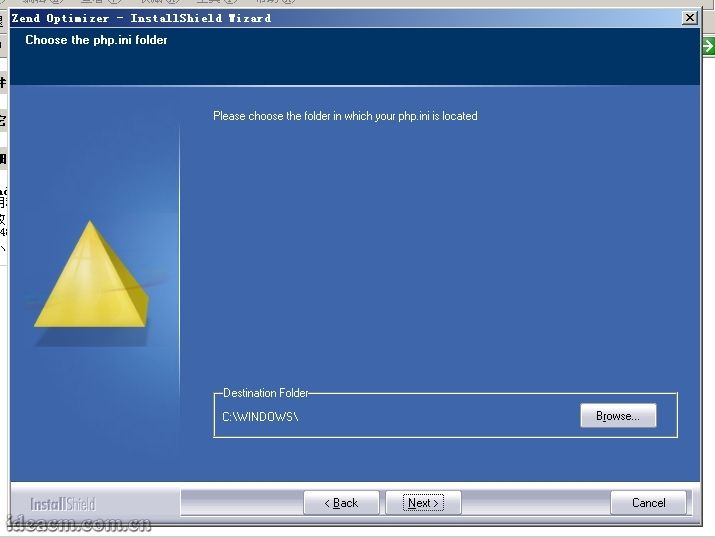
3.5.5、 点击 [Next>]继续 【图五十二所示】
选择PHP的配置文件 php.ini所在目录,这里自动 默认路径为Windows系统所在目录(C:\Windows,如果你的系统装在D盘,那这里就应该输入D:\Windows),如果这里的默认路径不是Windows系统所在目录请手动修改。
【图五十二】
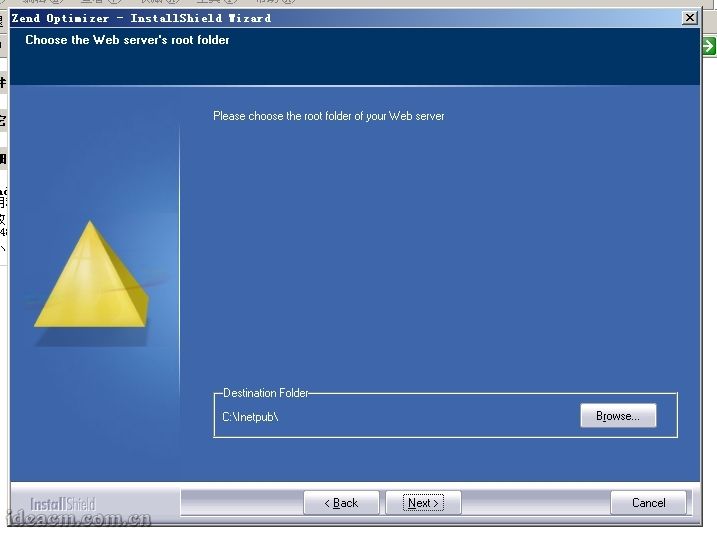
3.5.6、 点击 [Next>]继续 【图五十三所示】
这里是选择你的网站所在目录,这里你可以根据自己的默认站点目录来选,也可以直接选择到 D:\PHP\Zend,为了规范网站目录结构,我这里把预备建立的网站都放在 D:\webroot目录下,所以我把的路径修改为 D:\webroot 【图五十四所示】
【图五十三】
【图五十四】
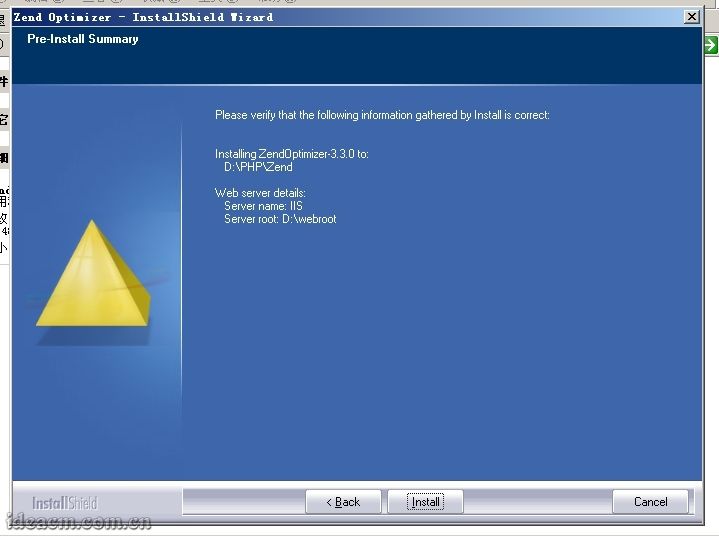
3.5.7、 点击 [Next>]继续 【图五十五所示】
这个界面是前面一步步的设置预览,如果前面设置有误需要修改的,点击 [<Back]按钮返回,按照需求修改。如果确认没有问题,就直接点击 [Install]按钮进行安装。
【图五十五】
3.5.8、点击 [Install]按钮后会弹出一个对话框,大意就是在接下来的安装过程中需要关闭IIS服务,直到安装过程完成,点击“ 是(Y)”同意执行,点击“ 否(N)”拒绝执行,这里点击“ 是(Y)”。 【图五十六所示】
【图五十六】
3.5.9、 正在停止Web server(IIS) 【图五十七所示】
Zend安装好后,自动开启Web Server(IIS) 【图五十八所示】
【图五十七】
【图五十八】
3.5.10、整个zend安装过程完成,去掉“ View Readme Now”查看说明文件前面的勾,点击 [Finish]按钮,完成安装。 【图五十九所示】
【图五十九】
3.5.11、关于Zend Optimizer配置文件的详细说明可以参考相关资料,或者浏览这个网址: http://ideacm.com.cn/read.php?12
第六步、配置phpMyAdmin以便管理MySQL
3.6.1、在 D:\PHP下建立名为 phpMyAdmin的目录,将下载得到的 phpMyAdmin-2.11.9.4-all-languages.zip解压后把其内文件和文件夹复制到里面。 【图六十所示】
【图六十】
3.6.2、首先打开 Internet 信息服务(IIS)管理器,点击“ +”展开目录树,再展开网站,在 默认网站上点击鼠标右键- 新建- 虚拟目录。 【图六十一所示】
【图六十一】
3.6.3、在弹出的面板中点击 下一步按钮,在别名栏目输入: phpmyadmin 【图六十二所示】
【图六十二】
3.6.4、点击 下一步按钮,路径选择: D:\PHP\phpMyAdmin 【图六十三所示】
【图六十三】
3.6.5、 点击 下一步按钮,勾选“ 读取”、“ 运行脚本(如asp)”这两项 【图六十四所示】,再点击 下一步- 完成。
【这一步的设置可以根据你自己的具体需求建立一个独立网站来作为phpMyAdmin或者在任意你已经建立的网站中建立一个虚拟目录来使用phpMyAdmin】
【图六十四】
3.6.6、 找到并打开 D:\PHP\phpMyAdmin\libraries目录下的 config.default.php文件。
3.6.7、 查找: $cfg['PmaAbsoluteUri'] = '';
这里是设置你的 phpMyAdmin的Web访问地址,根据上一步的设置,我这这里填写的地址是: http://localhost/phpmyadmin/ 【图六十五所示】
$cfg['PmaAbsoluteUri'] = 'http://localhost/phpmyadmin/';
【图六十五】
3.6.8、 查找: $cfg['blowfish_secret'] = '';
这里是设置cookie加密密匙,可以设置任意合法字符。我这里设置如: 【图六十六所示】
【图六十六】
3.6.9、 查找: $cfg['Servers'][$i]['auth_type'] = 'config';
默认 config,如果设置为 config,只需要直接访问phpmyadmin的登录地址,就可以直接管理MySQL了,是不安全的,不推荐。
推荐使用 cookie,将其设置为: $cfg['Servers'][$i]['auth_type'] = 'cookie'; 【图六十七所示】
【图六十七】
3.6.10、如果你一定要设置为 config,请在紧接着下面几行中填写你的MySQL管理帐号 root和 密码。 【图六十八所示】
【图六十八】
3.6.11、查找: $cfg['DefaultLang'] = 'en-iso-8859-1';
将其设置为: $cfg['DefaultLang'] = ' zh-gb2312';
3.6.12、查找: $cfg['DefaultCharset']
将其设置为 $cfg['DefaultCharset'] = 'gb2312';
3.6.13、然后保存关闭。
phpMyAdmin的更丰富的功能,请参考相关资料慢慢熟悉,这里不详细赘述。
第七步、目录权限设置(这里的权限设置仅供参考,根据你的实际需求可做更详细、严格的权限控制,这里不详细赘述。)
3.7.1、 D:\PHP目录设置为 管理员用户组或者 某一个管理员组的帐号、 system完全权限, users组读取和运行权限。
php5、 tmp目录给予 everyone完全控制权限。
MySQL5、 Zend继承上级PHP目录权限即可。
phpMyAdmin在继承上级PHP目录权限的基础上, 增加一个Internet来宾帐户读取和运行的权限。
四、配置完成,通过打开phpMyAdmin监测刚才的配置是否正确
4.1、 双击桌面上的IIS.bat文件重启IIS服务器,然后再在浏览器地址栏输入:
http://localhost/phpmyadmin
将会出现phpMyAdmin的登录界面 【图六十九所示】
【图六十九】
4.2、输入MySQL的管理帐号 root和之前配置MySQL过程中设置的root的帐号 密码,点击 执行按钮,即可登陆 phpMyAdmin进行MySQL管理操作。 【图七十所示】
【图七十】
至此,整个环境配置完成。
五、补充说明
5.1 、为了避免在重装服务器系统后重新复制php5目录中的dll文件到系统所在的 C:\windows\system32 目录下,可以将 3.1.2 步骤跳过不要操作,然后鼠标右键点击桌面上的“我的电脑” - 属性 - 高级 - 环境变量 - 系统变量 - 然后找到“ Path ”这个变量,点击编辑,在最后面加上“ ;D:\PHP\php5”(引号内的字符,不包含引号),点击 确定 ,再点击新建,变量名输入“ phpext ”,变量值输入“ D:\PHP\php5\ext ”,点击确定。
5.2 、为了避免倒是部分 php 程序因 session 配置而无法正常使用,可以将 3.1.7 步骤跳过不要操作。
5.3 、把整个配置过程都完成后,重启电脑。
5.4 、如果全部配置完成后,访问 phpmyadmin 出现红色界面的提示,请按照 3.6.6-3.6.13 核对一遍 phpmyadmin 的设置,然后再根据 3.7.1 检查权限设置。
-
3
评分次数
相关文章
-
 这篇文章主要介绍了PHP zip扩展Linux下安装过程分享,需要的朋友可以参考下2014-05-05
 -
 当网站的留言内容越来越多的时候,分页功能的应用就应运而生了,本文我们就来重点讲解下ThinkPHP框架自带的分页类的调用2014-03-03
 -
 利用PHP和AJAX创建RSS聚合器的代码...2007-03-03
 -
 这篇文章主要介绍了Yii2框架操作数据库的方法,结合实例形式分析了Yii2框架配置、连接mysql数据库及执行SQL进行增删改查等相关操作技巧,需要的朋友可以参考下2019-05-05
 -
 用PHPExcel读取Excel 2007 或者Excel2003文件,需要的朋友,可以参考下。2011-12-12
 -

ThinkPHP模板Volist标签嵌套循环输出多维数组的方法
这篇文章主要介绍了ThinkPHP模板Volist标签嵌套循环输出多维数组的方法,结合实例形式详细分析了Volist标签嵌套调用输出多维数组的相关技巧,需要的朋友可以参考下2016-03-03 -
 这篇文章主要介绍了laravel的用户修改密码与绑定邮箱的详细操作,本文给大家介绍的非常详细,对laravel修改密码与绑定邮箱的操作感兴趣的朋友一起看看吧2021-09-09
 -
 命名空间主要是为了解决代码中类和函数可能存在冲突的问题。这篇文章给大家介绍php关键特性之命名空间,包括命名空间的定义等知识点,需要的朋友参考下吧2017-05-05
 -
 最近需要开发一个头像上传的功能,找了很多都需要授权的,后来找到了美图秀秀,功能非常好用。2014-06-06
 -
 这篇文章主要为大家介绍了php对用户密码进行加密技巧实例,有需要的朋友可以借鉴参考下,希望能够有所帮助,祝大家多多进步,早日升职加薪2023-12-12
最新评论